> ## Documentation Index
> Fetch the complete documentation index at: https://docs.imagine.art/llms.txt
> Use this file to discover all available pages before exploring further.
# Characters
> Create custom characters and products from reference images and use them consistently across your generations.
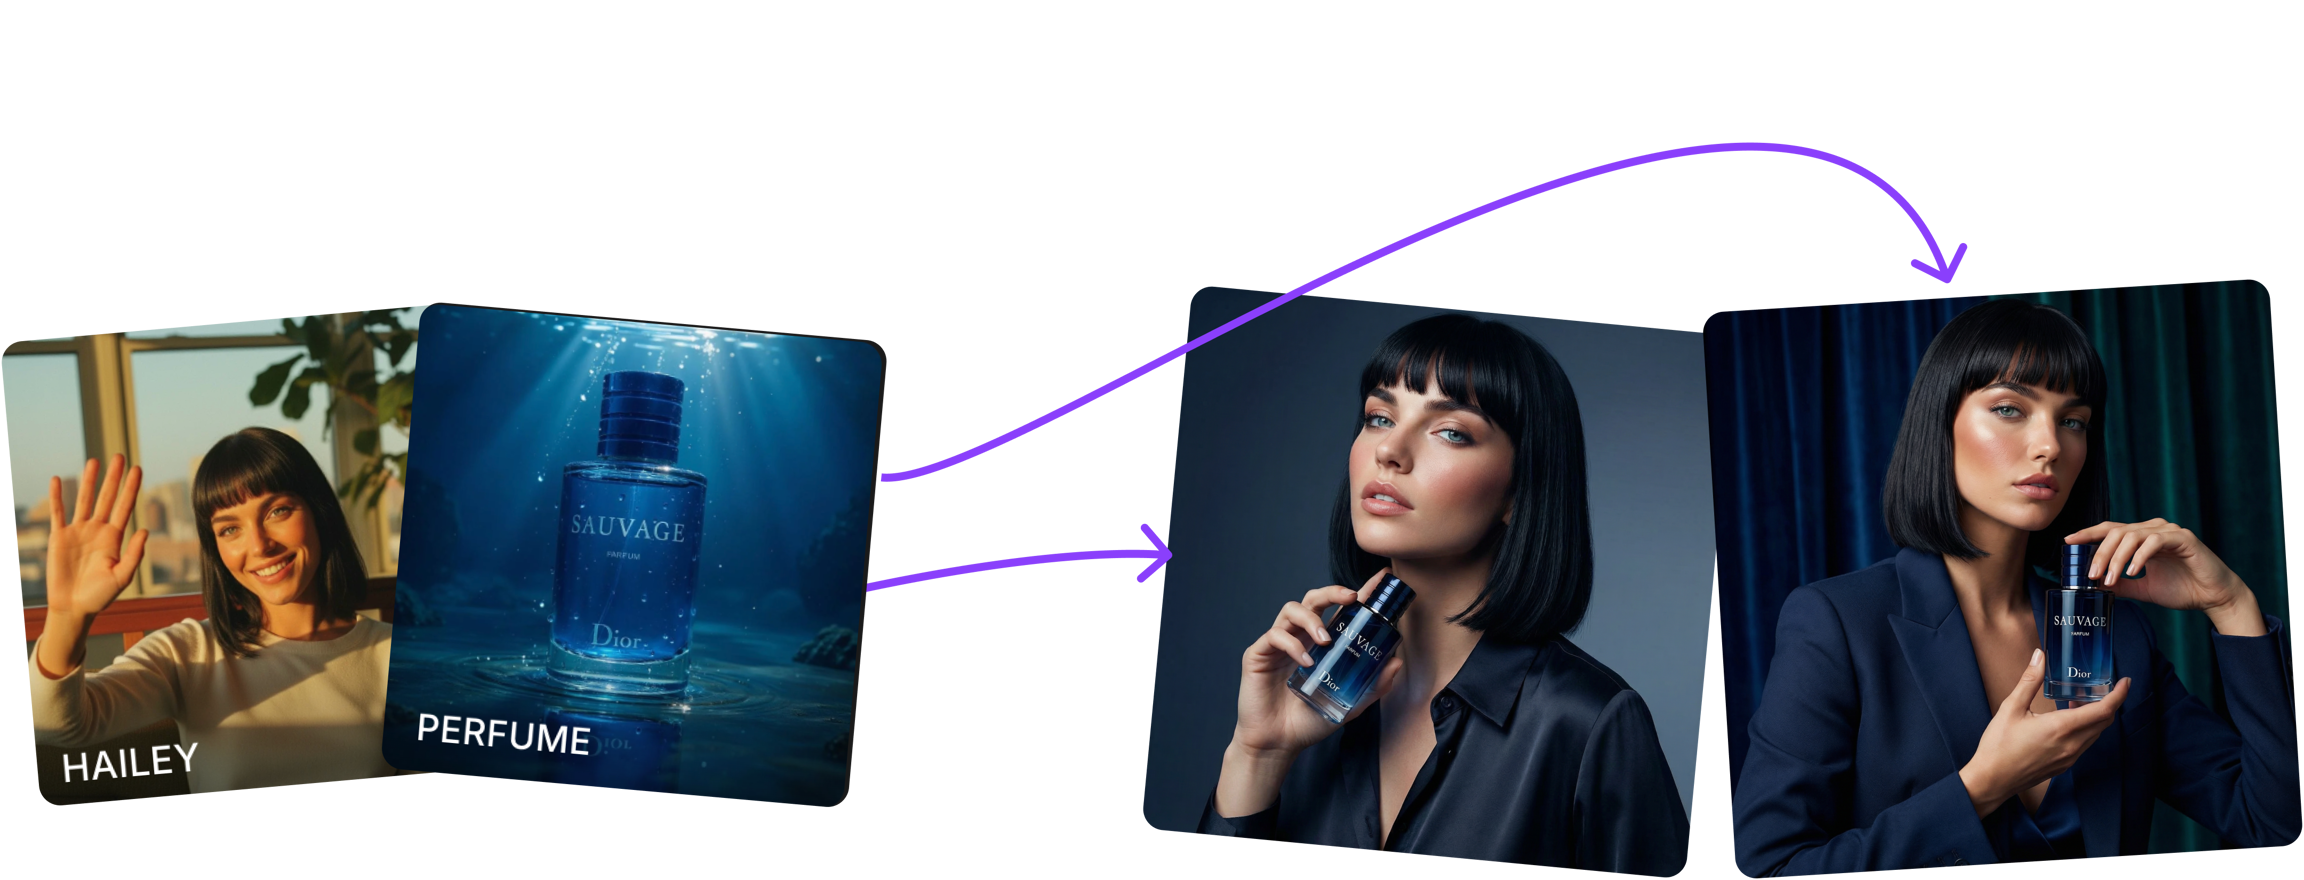
**Characters** lets you train a custom character or product from your own reference images and then use it directly in your prompts. Instead of describing a character from scratch every time, you build a reusable identity once—and the AI references that identity every time you generate.
You can access Characters from the **Add References** option in the image generation panel.
 ## How Characters works
When you create a character, ImagineArt analyzes your uploaded reference images and builds an internal representation of that subject's visual identity. You can then call that identity into any prompt, either by selecting it from the image panel or by tagging it with `@CharacterName` directly in your prompt text.
## Setting up a Character
In the image generation panel, click **Add References** and select the **Characters** tab.
## How Characters works
When you create a character, ImagineArt analyzes your uploaded reference images and builds an internal representation of that subject's visual identity. You can then call that identity into any prompt, either by selecting it from the image panel or by tagging it with `@CharacterName` directly in your prompt text.
## Setting up a Character
In the image generation panel, click **Add References** and select the **Characters** tab.

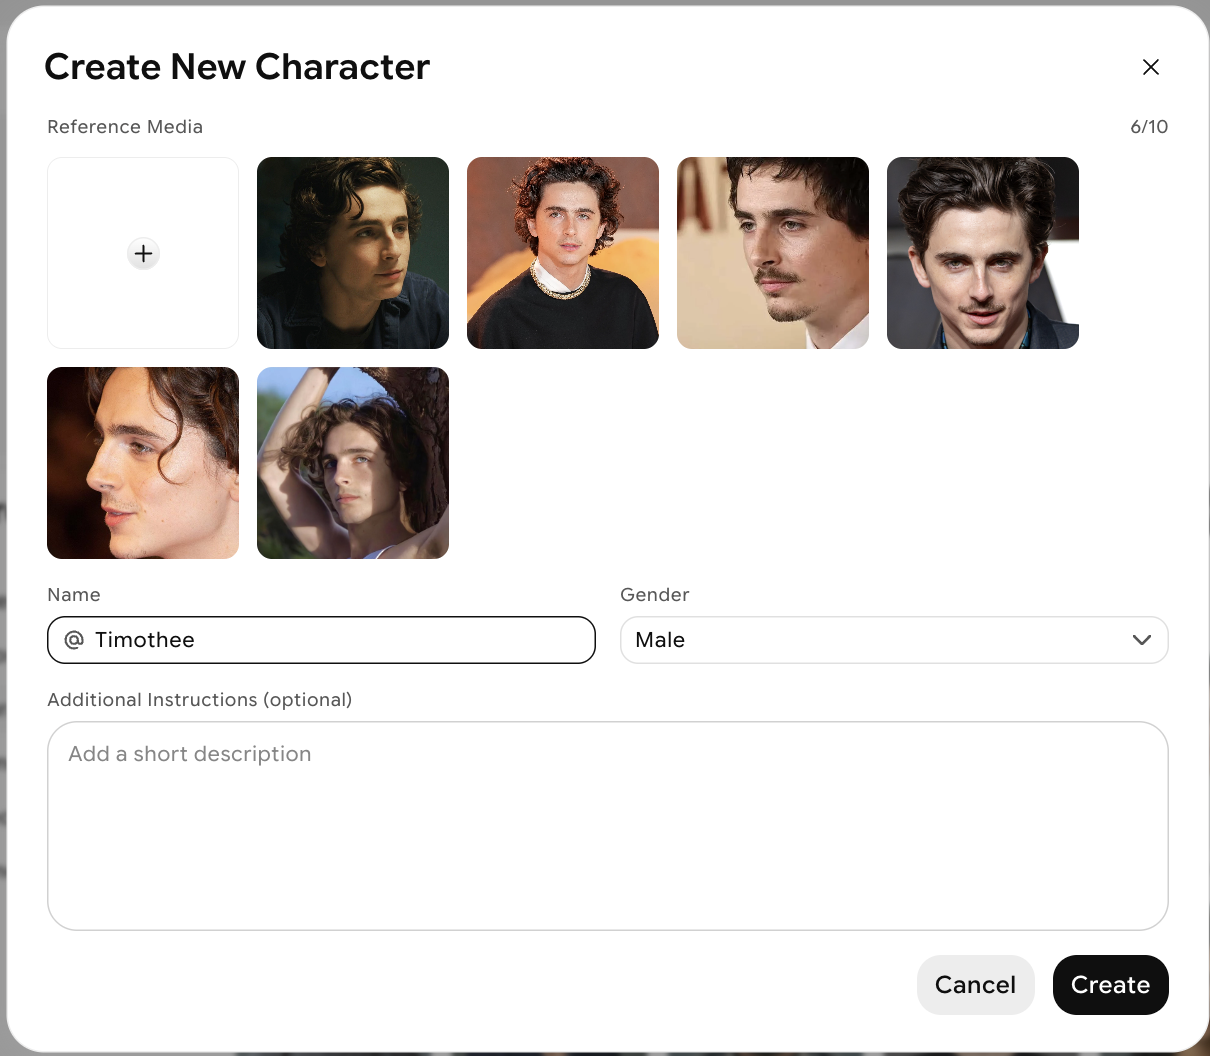
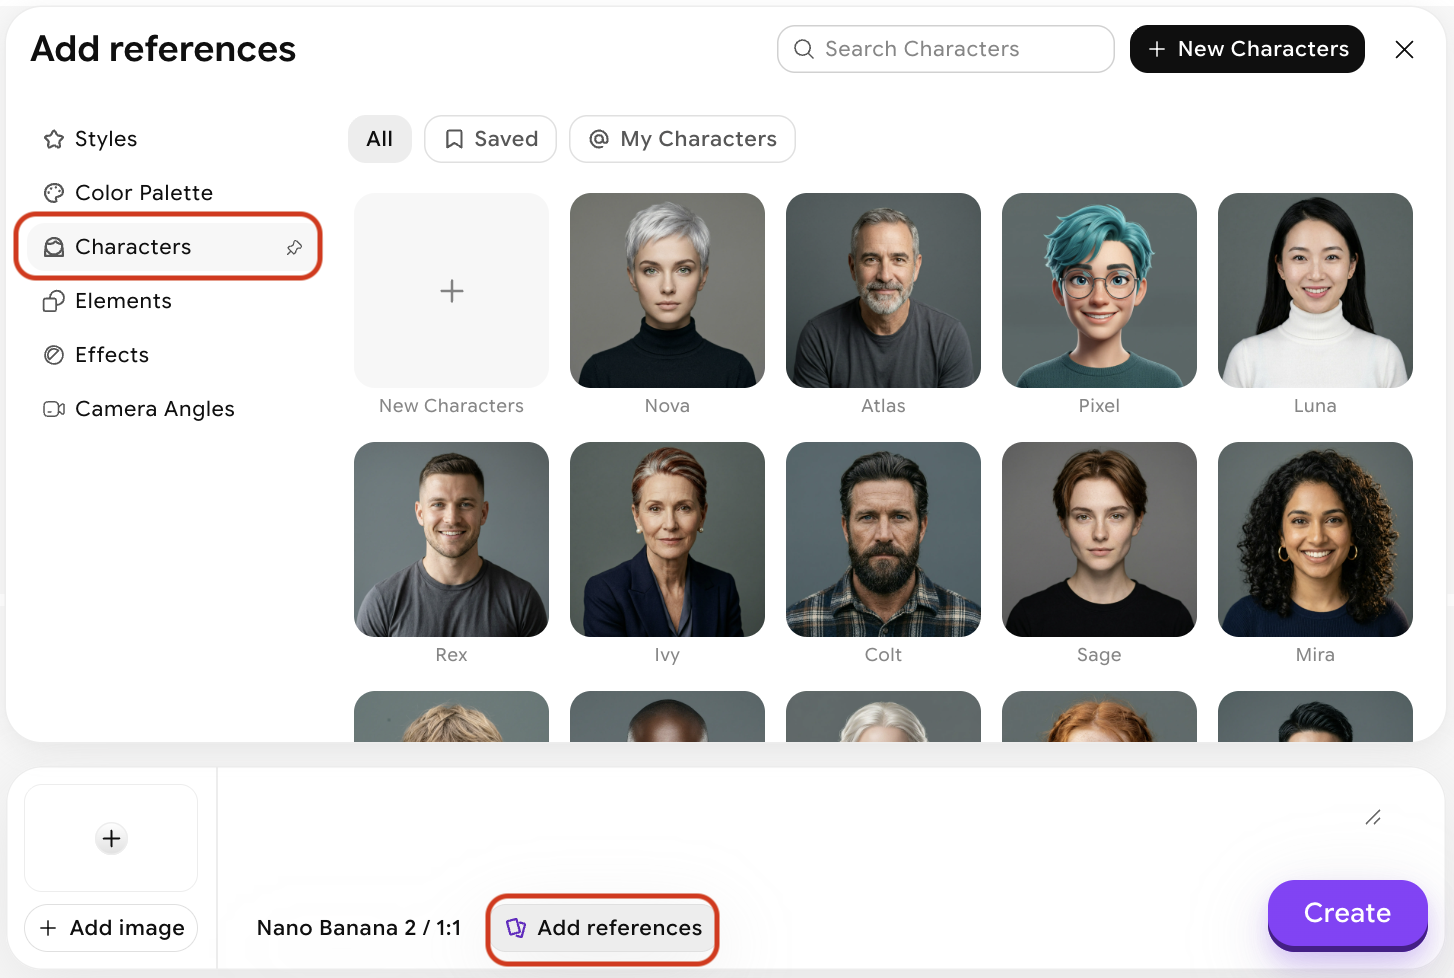 Click **New Characters** (+) to create your own, or select one of our presets. Upload up to 10 reference images for your character — including different angles improves consistency. Give your character a name, select their gender, and optionally add a description.
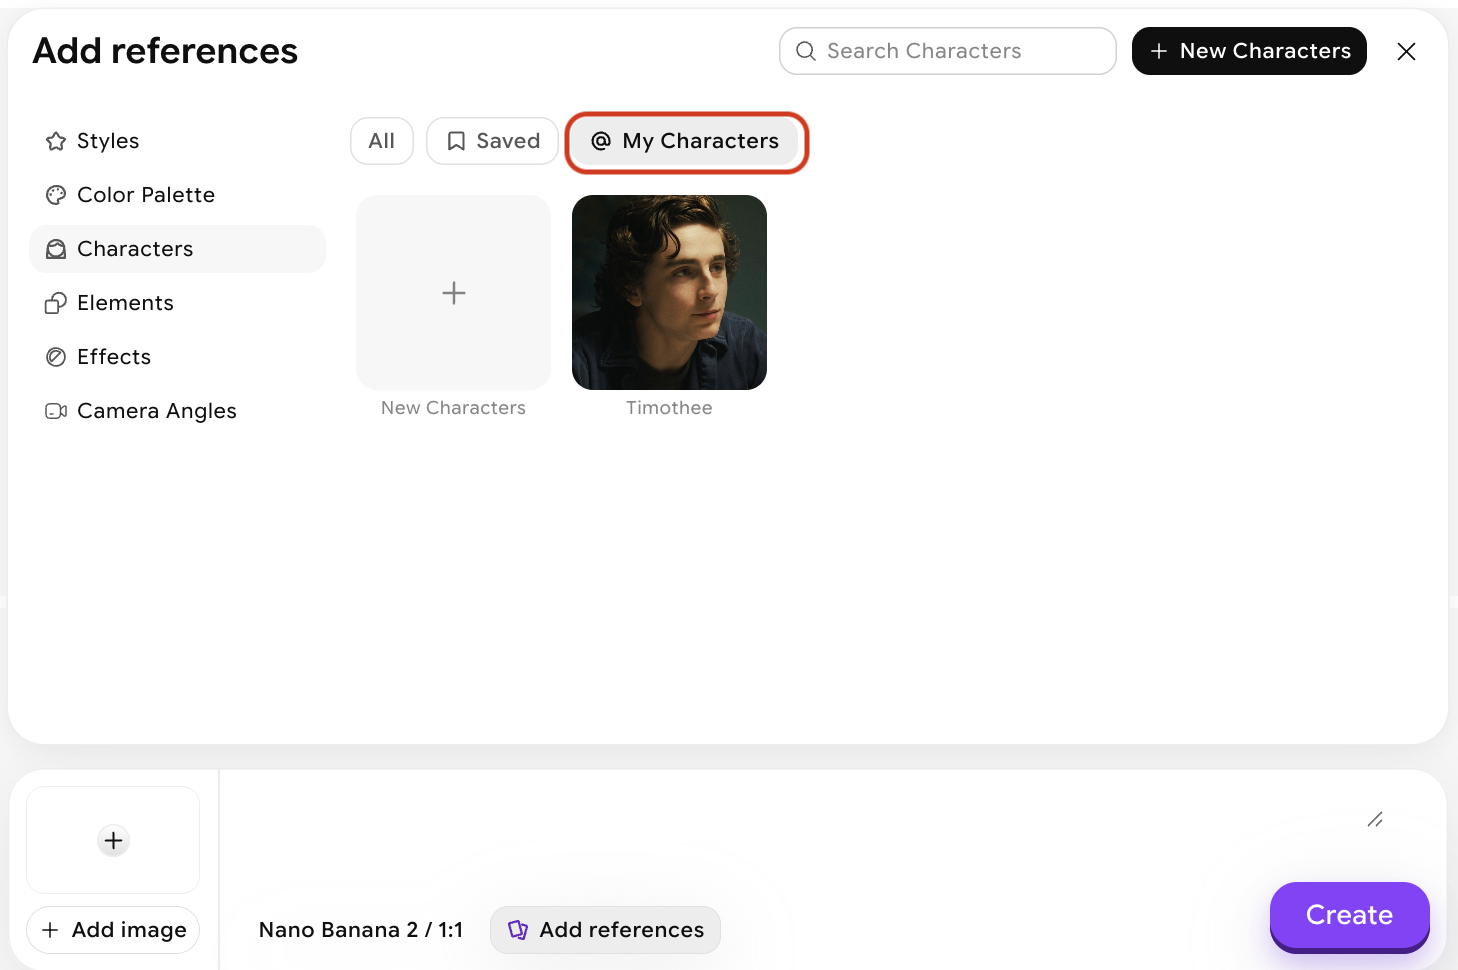 After clicking **Create**, your character will be saved under the **My Characters** tab. You can also reference it in any prompt using `@CharacterName`.
## Tips for better results
* **Use 4–10 reference images** for characters when possible. A wider variety of reference angles significantly improves consistency.
* **Name your characters descriptively** — names like `ElenaStudio` make it easier to remember which reference to call.
* **Combine with other references** — You can use Characters alongside Style and Image Prompt to further control the output's composition and aesthetic.
After clicking **Create**, your character will be saved under the **My Characters** tab. You can also reference it in any prompt using `@CharacterName`.
## Tips for better results
* **Use 4–10 reference images** for characters when possible. A wider variety of reference angles significantly improves consistency.
* **Name your characters descriptively** — names like `ElenaStudio` make it easier to remember which reference to call.
* **Combine with other references** — You can use Characters alongside Style and Image Prompt to further control the output's composition and aesthetic.