> ## Documentation Index
> Fetch the complete documentation index at: https://docs.imagine.art/llms.txt
> Use this file to discover all available pages before exploring further.
# Auto Clipper
> Turn a long video into short, captioned vertical clips ready for YouTube Shorts, Instagram Reels, and TikTok.
Auto Clipper turns long-form content into short clips automatically. Paste a YouTube link or upload a video, and Auto Clipper picks the moments worth sharing, reframes them to a vertical crop, and burns in captions. You don't need to scrub through a timeline or trim anything by hand.
## How to create clips
Go to [Video Studio](https://www.imagine.art/video) and select **Auto Clipper** under **Choose a Mode**.
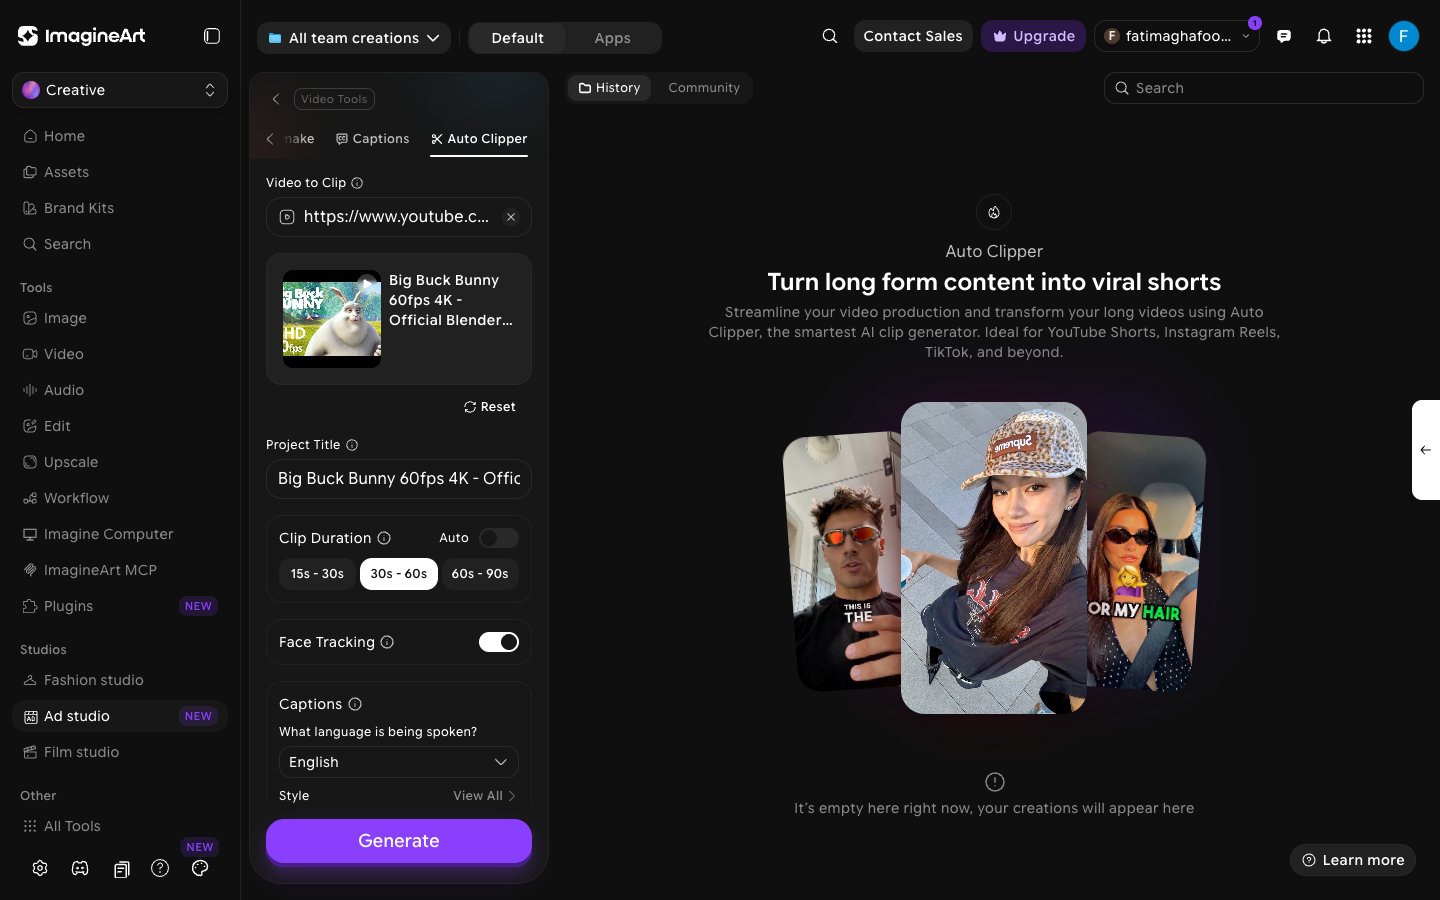
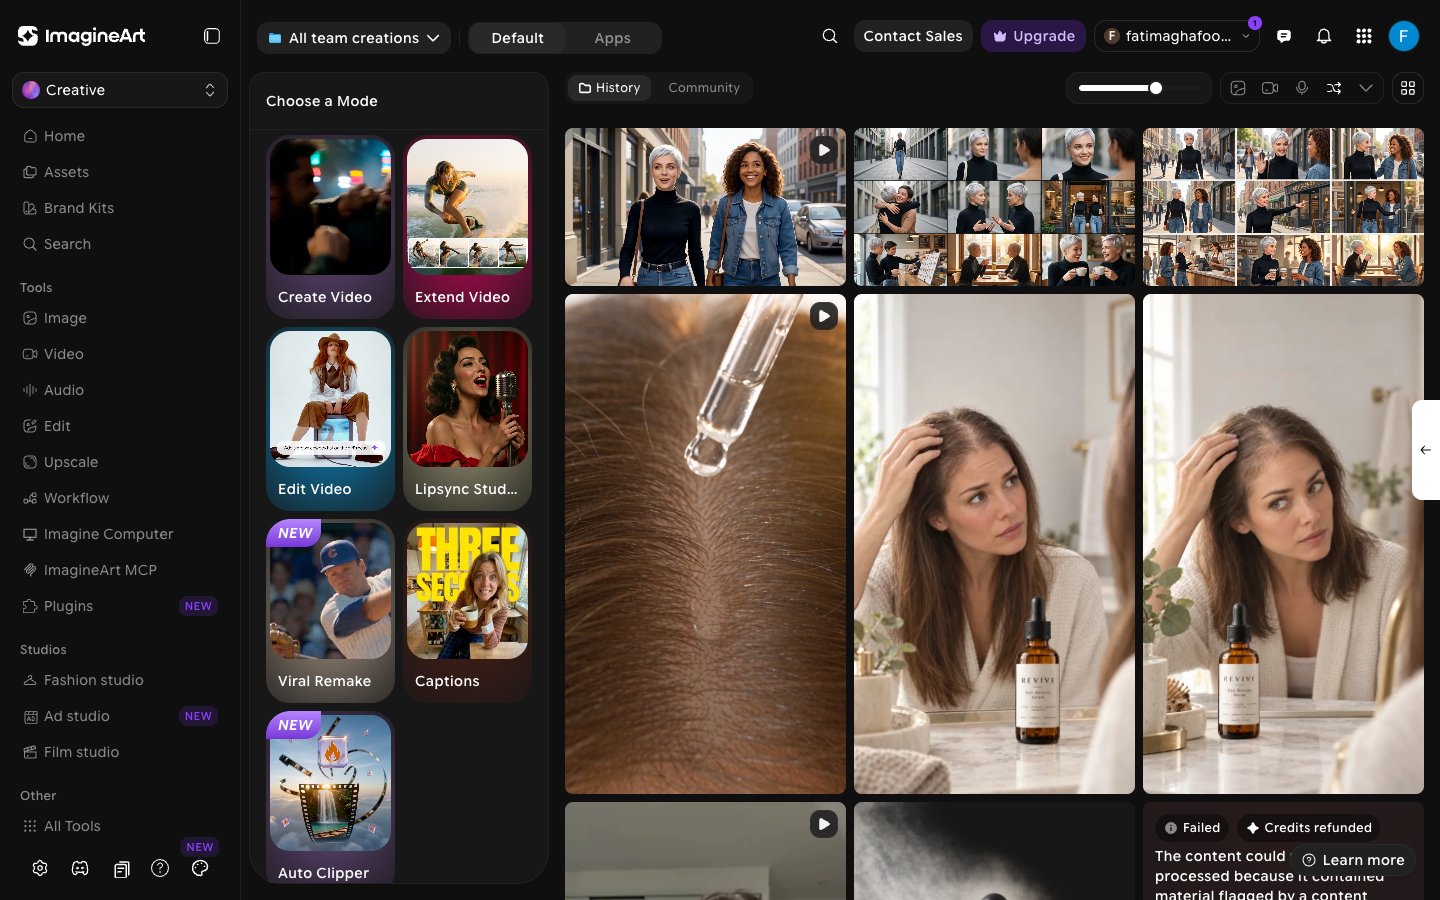 Under **Video to Clip**, do one of the following:
* Paste a YouTube link into the **Paste your YouTube video link here** field.
* Click **Or upload your video** and choose an MP4 or MOV file, up to 100MB.
A preview with the video's title appears. Click **Reset** to clear it and start over.
Adjust the settings below the preview:
| Setting | What it does |
| - | - |
| **Project Title** | Names this clipping project in your projects list. It's filled in from the video title, and you can edit it. |
| **Clip Duration** | Keep **Auto** on to let Auto Clipper pick the best length for each clip. Turn it off to choose a fixed range: **15s - 30s**, **30s - 60s**, or **60s - 90s**. |
| **Face Tracking** | Keeps the speaker centered while the clip is reframed to a vertical crop. |
| **Captions** | Captions are transcribed from your video and burned into every clip. Choose the language being spoken under **What language is being spoken?**, then pick a caption **Style**. Click **View All** to browse every caption style. |
Under **Video to Clip**, do one of the following:
* Paste a YouTube link into the **Paste your YouTube video link here** field.
* Click **Or upload your video** and choose an MP4 or MOV file, up to 100MB.
A preview with the video's title appears. Click **Reset** to clear it and start over.
Adjust the settings below the preview:
| Setting | What it does |
| - | - |
| **Project Title** | Names this clipping project in your projects list. It's filled in from the video title, and you can edit it. |
| **Clip Duration** | Keep **Auto** on to let Auto Clipper pick the best length for each clip. Turn it off to choose a fixed range: **15s - 30s**, **30s - 60s**, or **60s - 90s**. |
| **Face Tracking** | Keeps the speaker centered while the clip is reframed to a vertical crop. |
| **Captions** | Captions are transcribed from your video and burned into every clip. Choose the language being spoken under **What language is being spoken?**, then pick a caption **Style**. Click **View All** to browse every caption style. |
 Hover over **Generate** to see the credit cost for your video, then click **Generate**. Your clips appear in **History** when they're ready.
Clipping a long video can cost over 1,000 credits. Always check the cost on the **Generate** button before you start.
## What to do next
Increase the resolution of a clip before you publish it.
Check a clip for potential copyright issues before it goes live.
This documentation is built and hosted on [Mintlify](https://mintlify.com), a developer documentation platform.
Hover over **Generate** to see the credit cost for your video, then click **Generate**. Your clips appear in **History** when they're ready.
Clipping a long video can cost over 1,000 credits. Always check the cost on the **Generate** button before you start.
## What to do next
Increase the resolution of a clip before you publish it.
Check a clip for potential copyright issues before it goes live.
This documentation is built and hosted on [Mintlify](https://mintlify.com), a developer documentation platform.