> ## Documentation Index
> Fetch the complete documentation index at: https://docs.imagine.art/llms.txt
> Use this file to discover all available pages before exploring further.
# Captions
> Add styled, auto-transcribed captions to your video.
Captions transcribes the speech in your video and burns styled captions into it. Choose a caption style from the presets, set where the captions sit on screen, and optionally translate them into another language.
## How to add captions
Go to [Video Studio](https://www.imagine.art/video) and select **Captions** under **Choose a Mode**.
Click **Upload a video** and choose an MP4 or MOV file, up to 100MB.
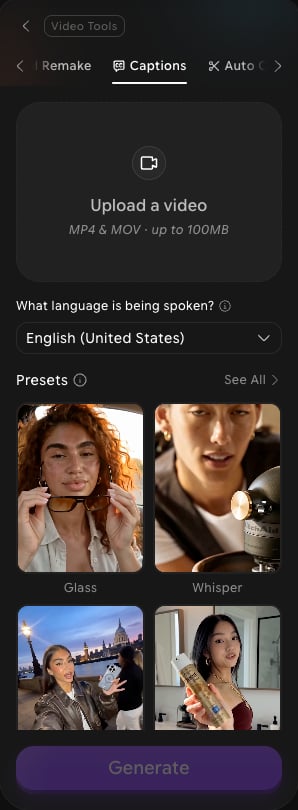 Under **What language is being spoken?**, select the language used in your video. The default is **English (United States)**.
Under **Presets**, pick a style such as **Glass**, **Whisper**, **Glide 2**, or **Fusion**. Click **See All** to browse every caption style.
Click **Advanced options** to change these settings:
| Setting | What it does |
| - | - |
| **Position** | Places the captions at the **Bottom**, **Center**, or **Top** of the frame. The default is **Bottom**. |
| **Translation Language** | Translates the captions into the language you select. |
Hover over **Generate** to see the credit cost, then click **Generate**. Your captioned video appears in **History** when it's ready.
## What to do next
Turn a long video into short clips, with captions added automatically.
Remake a viral video with your own characters, products, or clothes.
This documentation is built and hosted on [Mintlify](https://mintlify.com), a developer documentation platform.
Under **What language is being spoken?**, select the language used in your video. The default is **English (United States)**.
Under **Presets**, pick a style such as **Glass**, **Whisper**, **Glide 2**, or **Fusion**. Click **See All** to browse every caption style.
Click **Advanced options** to change these settings:
| Setting | What it does |
| - | - |
| **Position** | Places the captions at the **Bottom**, **Center**, or **Top** of the frame. The default is **Bottom**. |
| **Translation Language** | Translates the captions into the language you select. |
Hover over **Generate** to see the credit cost, then click **Generate**. Your captioned video appears in **History** when it's ready.
## What to do next
Turn a long video into short clips, with captions added automatically.
Remake a viral video with your own characters, products, or clothes.
This documentation is built and hosted on [Mintlify](https://mintlify.com), a developer documentation platform.