> ## Documentation Index
> Fetch the complete documentation index at: https://docs.imagine.art/llms.txt
> Use this file to discover all available pages before exploring further.
# Lipsync
> Transform a still image into a talking avatar by syncing facial movements and lip animations to audio or text-to-speech.
Lipsync turns a static portrait or avatar image into a speaking video. You provide an image and either an audio file or written text, and the AI generates realistic facial movements and lip animations that match the speech. The result is a professional-quality talking-head video produced in minutes.
-2.avif?fit=max&auto=format&n=2i1lxqk1SMoBGaWs&q=85&s=bb56b686adf75686b6285225813b6eb2) ## How to create a lipsync video
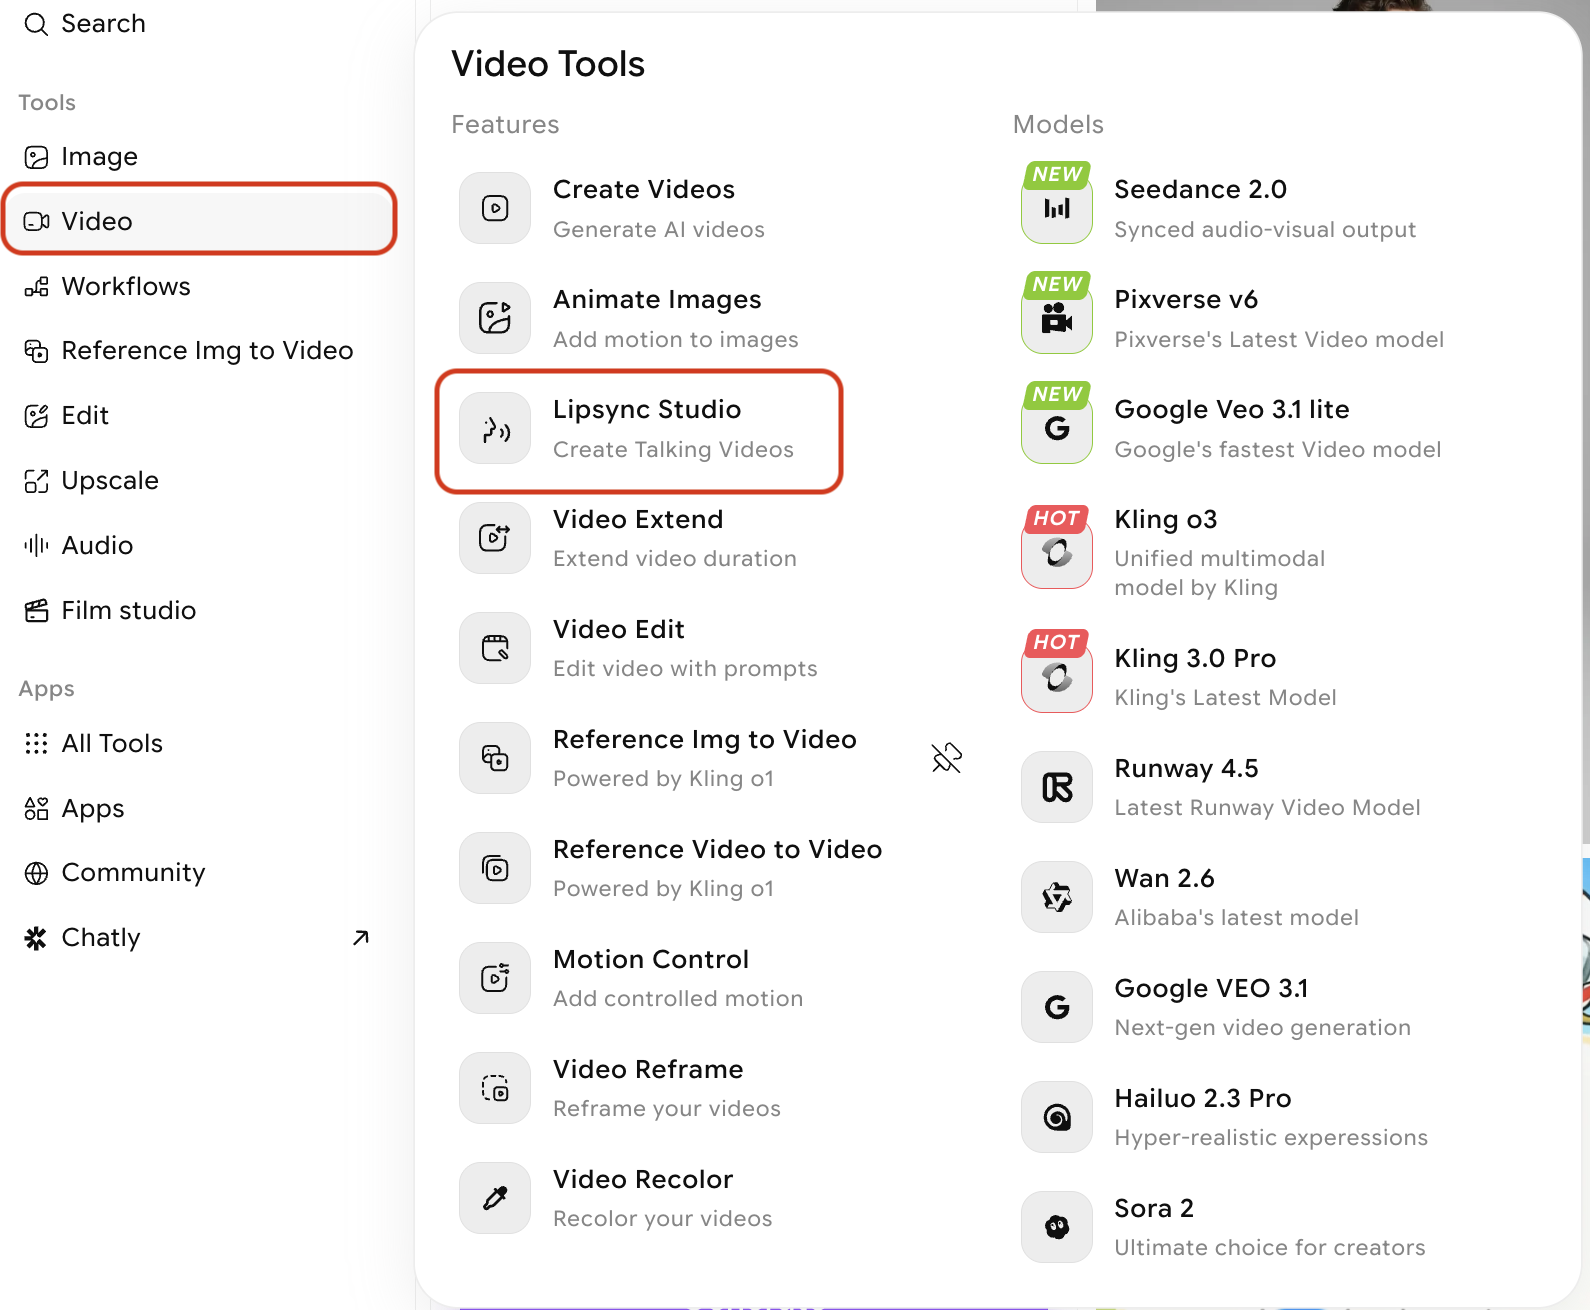
Select **Lipsync** from the modal that appears when you hover over **Video** from the left navbar
## How to create a lipsync video
Select **Lipsync** from the modal that appears when you hover over **Video** from the left navbar
 Select the model that best fits your project requirements. Each model offers different duration, resolution, and aspect ratio options.
-2.avif?fit=max&auto=format&n=2i1lxqk1SMoBGaWs&q=85&s=2e769c94ca265b3ff1f1d122963abbf5) | Model | Duration | Resolution | Takes Audio Input? |
| --------------------- | --------------- | ------------ | ------------------ |
| Kling 2.6 Pro | 5s, 10s | View Tooltip | No |
| Google Veo 3.1 Fast | 8s | 720p-1080p | No |
| Google Veo 3.1 | 8s | 720p-1080p | No |
| Wan 2.5 Speak | 5s, 10s | 480p-1080p | No |
| Kling Avatars 2.0 Pro | Audio dependent | View tooltip | Yes |
| Infini Talk | Audio dependent | 480p-720p | Yes |
| OmniHuman (Bytedance) | Audio dependent | View tooltip | Yes |
| Fabric 1.0 VEED | Audio dependent | 480p-720p | Yes |
| Wan 2.6 | 5-15s | 720p-1080p | Yes |
Models marked **Same as image** preserve the aspect ratio of your uploaded photo, which is useful when you want to avoid cropping or letterboxing.
Upload a clear photo or illustration of the face you want to animate. Select from your library of existing ImagineArt creations, or upload a new image.
For the best lip sync results:
* Use a front-facing or near-front-facing portrait (slight angles are acceptable)
* Ensure the face occupies a significant portion of the frame
* Avoid heavy occlusion of the mouth area (scarves, masks, hands)
* Use a well-lit image with the face clearly in focus
* A clean or simple background produces cleaner output
Depending on the model, you have two input options:
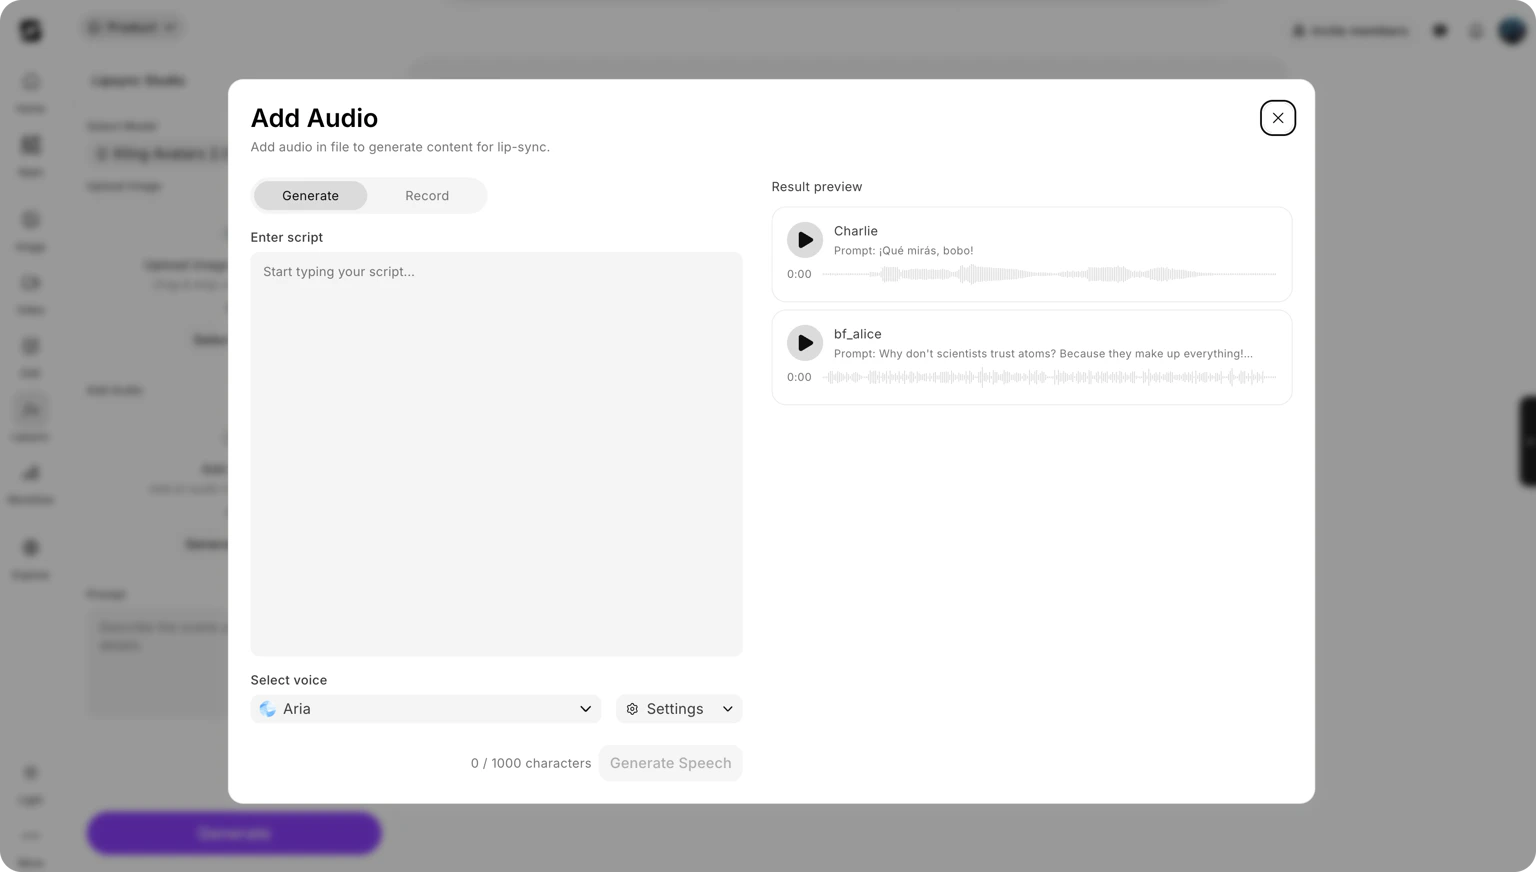
Type the script you want the avatar to speak. The model converts your text to speech using a built-in voice and syncs the facial animation to match. This option is supported by all lipsync models.
Upload a recorded audio file containing the speech you want to sync. This gives you full control over the voice, tone, pacing, and language. Check the individual model's settings panel to confirm audio upload support.
Ensure any audio you upload is speech you have the rights to use. Do not upload audio recordings of other individuals without their consent.
| Model | Duration | Resolution | Takes Audio Input? |
| --------------------- | --------------- | ------------ | ------------------ |
| Kling 2.6 Pro | 5s, 10s | View Tooltip | No |
| Google Veo 3.1 Fast | 8s | 720p-1080p | No |
| Google Veo 3.1 | 8s | 720p-1080p | No |
| Wan 2.5 Speak | 5s, 10s | 480p-1080p | No |
| Kling Avatars 2.0 Pro | Audio dependent | View tooltip | Yes |
| Infini Talk | Audio dependent | 480p-720p | Yes |
| OmniHuman (Bytedance) | Audio dependent | View tooltip | Yes |
| Fabric 1.0 VEED | Audio dependent | 480p-720p | Yes |
| Wan 2.6 | 5-15s | 720p-1080p | Yes |
Models marked **Same as image** preserve the aspect ratio of your uploaded photo, which is useful when you want to avoid cropping or letterboxing.
Upload a clear photo or illustration of the face you want to animate. Select from your library of existing ImagineArt creations, or upload a new image.
For the best lip sync results:
* Use a front-facing or near-front-facing portrait (slight angles are acceptable)
* Ensure the face occupies a significant portion of the frame
* Avoid heavy occlusion of the mouth area (scarves, masks, hands)
* Use a well-lit image with the face clearly in focus
* A clean or simple background produces cleaner output
Depending on the model, you have two input options:
Type the script you want the avatar to speak. The model converts your text to speech using a built-in voice and syncs the facial animation to match. This option is supported by all lipsync models.
Upload a recorded audio file containing the speech you want to sync. This gives you full control over the voice, tone, pacing, and language. Check the individual model's settings panel to confirm audio upload support.
Ensure any audio you upload is speech you have the rights to use. Do not upload audio recordings of other individuals without their consent.
 Some models accept a text prompt alongside the image and audio. Use this to describe the context or setting, for example: `avatar speaking in a classroom` or `presenter delivering a keynote on stage`. This can influence the generated background, lighting, and overall mood.
Click **Generate**. The AI processes the image and audio or text, then produces a video with the avatar's face animated to match the speech. Generation typically takes 30–60 seconds.
## Tips for best results
* **Use a high-quality source image.** Blurry or low-resolution portraits produce less accurate facial animations. A sharp, well-lit photo at 512px or above gives the model more detail to work with.
* **Keep audio clear and clean.** Audio with background noise, music, or multiple overlapping voices can confuse the sync algorithm. Use isolated speech recordings when possible.
* **Match duration to content.** Choose a model duration that fits your script length. If your script is 4 seconds of speech, selecting a 10-second model will result in silence or padding at the end.
* **Front-facing portraits perform best.** Profiles and severe three-quarter angles reduce the quality of lip movement mapping. The more of the front of the face that is visible, the more accurate the animation.
* **Simple backgrounds reduce visual artefacts.** Busy or complex backgrounds can sometimes show distortion around the face boundary. Solid or blurred backgrounds produce cleaner-looking output.
## What to do next
Generate video from text prompts to create the source clip you want to lipsync.
Change the background, lighting, or environment of an existing video.
Add 5 more seconds of content to the end of your video.
Understand how credits are consumed for lipsync generations.
Some models accept a text prompt alongside the image and audio. Use this to describe the context or setting, for example: `avatar speaking in a classroom` or `presenter delivering a keynote on stage`. This can influence the generated background, lighting, and overall mood.
Click **Generate**. The AI processes the image and audio or text, then produces a video with the avatar's face animated to match the speech. Generation typically takes 30–60 seconds.
## Tips for best results
* **Use a high-quality source image.** Blurry or low-resolution portraits produce less accurate facial animations. A sharp, well-lit photo at 512px or above gives the model more detail to work with.
* **Keep audio clear and clean.** Audio with background noise, music, or multiple overlapping voices can confuse the sync algorithm. Use isolated speech recordings when possible.
* **Match duration to content.** Choose a model duration that fits your script length. If your script is 4 seconds of speech, selecting a 10-second model will result in silence or padding at the end.
* **Front-facing portraits perform best.** Profiles and severe three-quarter angles reduce the quality of lip movement mapping. The more of the front of the face that is visible, the more accurate the animation.
* **Simple backgrounds reduce visual artefacts.** Busy or complex backgrounds can sometimes show distortion around the face boundary. Solid or blurred backgrounds produce cleaner-looking output.
## What to do next
Generate video from text prompts to create the source clip you want to lipsync.
Change the background, lighting, or environment of an existing video.
Add 5 more seconds of content to the end of your video.
Understand how credits are consumed for lipsync generations.