> ## Documentation Index
> Fetch the complete documentation index at: https://docs.imagine.art/llms.txt
> Use this file to discover all available pages before exploring further.
# Video Upscale
> Increase the resolution of any video so your final cut looks sharp on every screen.
Video Upscale takes an existing video to a higher resolution. Use it to sharpen AI-generated clips or older, low-resolution footage before you publish or deliver it.
## How to upscale a video
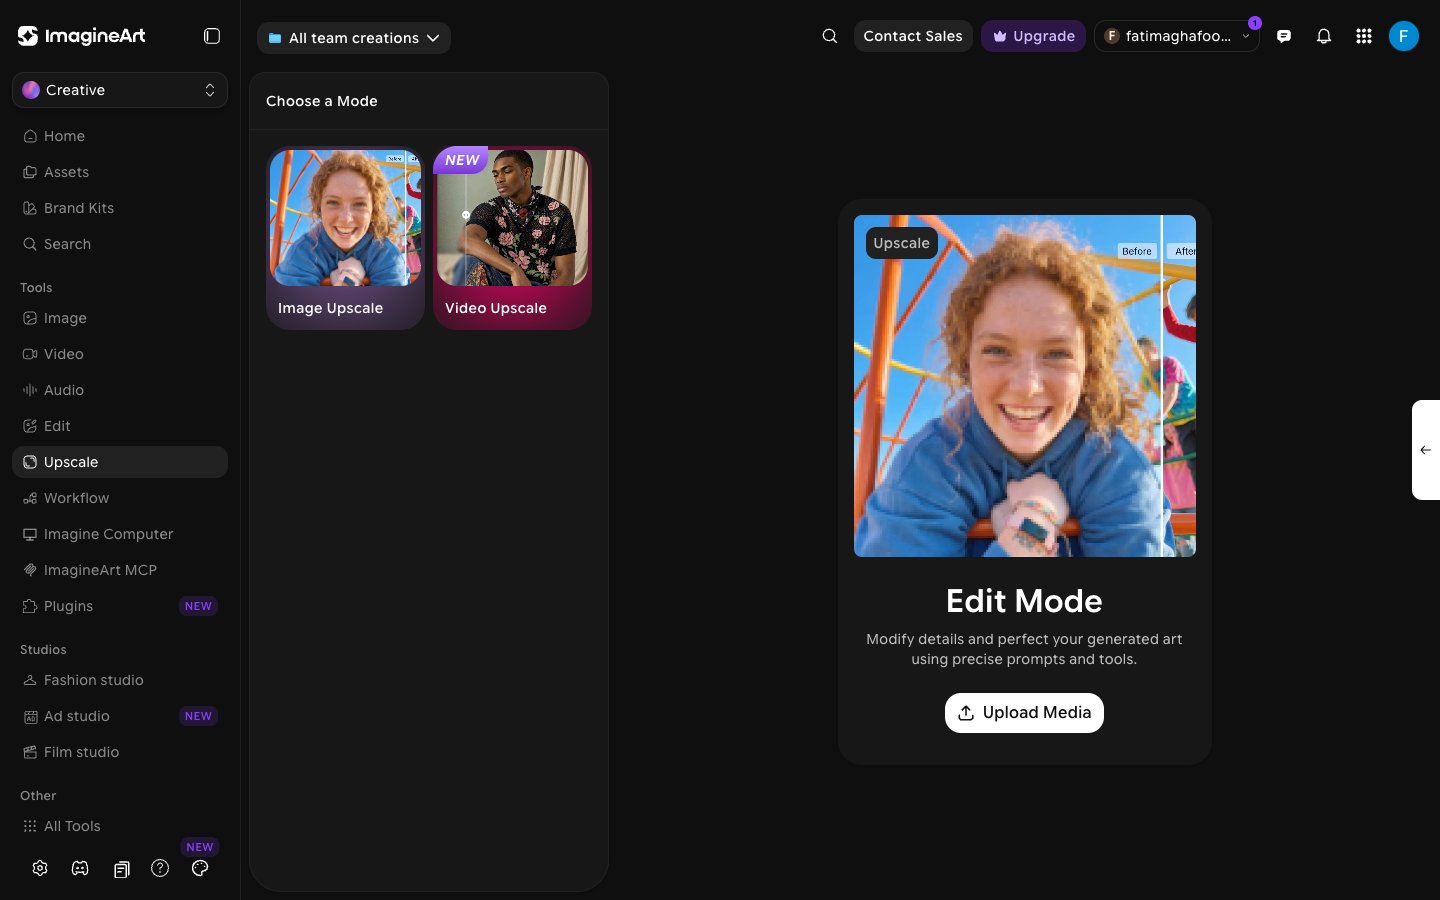
Click **Upscale** in the left sidebar, then select **Video Upscale** under **Choose a Mode**.
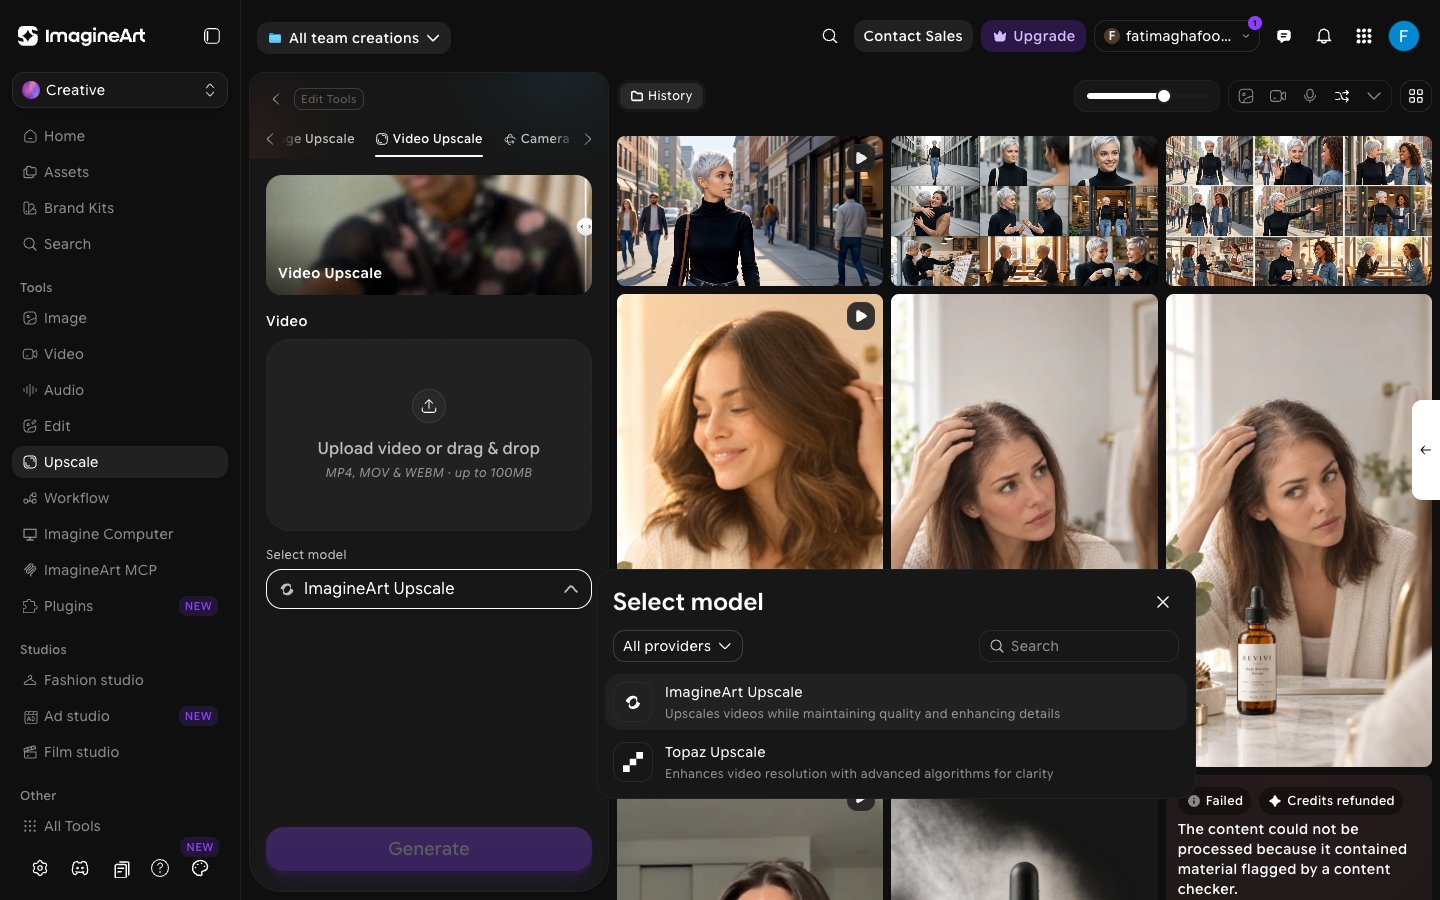
 Under **Video**, click **Upload video or drag & drop**. You can choose a video from your **Uploads** or **Creations**, or upload a new MP4, MOV, or WEBM file up to 100MB.
Open the **Select model** dropdown and choose a model:
* **ImagineArt Upscale**: Upscales videos while maintaining quality and enhancing details.
* **Topaz Upscale**: Enhances video resolution with advanced algorithms for clarity.
Under **Video**, click **Upload video or drag & drop**. You can choose a video from your **Uploads** or **Creations**, or upload a new MP4, MOV, or WEBM file up to 100MB.
Open the **Select model** dropdown and choose a model:
* **ImagineArt Upscale**: Upscales videos while maintaining quality and enhancing details.
* **Topaz Upscale**: Enhances video resolution with advanced algorithms for clarity.
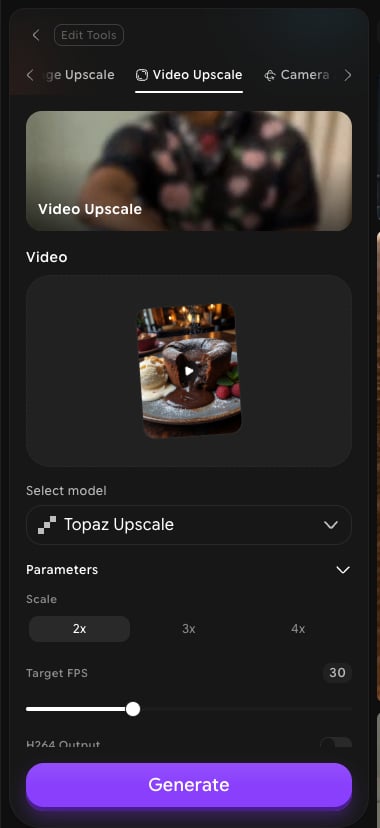
 When you select **Topaz Upscale**, a **Parameters** section appears:
| Setting | What it does |
| - | - |
| **Scale** | How much to increase the resolution: **2x**, **3x**, or **4x**. Higher scales cost more credits. |
| **Target FPS** | The frame rate of the upscaled video, from 16 to 60. The default is 30. |
| **H264 Output** | Turn on to export the result as H.264. |
**ImagineArt Upscale** has no extra parameters.
When you select **Topaz Upscale**, a **Parameters** section appears:
| Setting | What it does |
| - | - |
| **Scale** | How much to increase the resolution: **2x**, **3x**, or **4x**. Higher scales cost more credits. |
| **Target FPS** | The frame rate of the upscaled video, from 16 to 60. The default is 30. |
| **H264 Output** | Turn on to export the result as H.264. |
**ImagineArt Upscale** has no extra parameters.
 Hover over **Generate** to see the total credit cost for your settings, then click **Generate**. The upscaled video appears in **History**.
You can also upscale videos inside a workflow with the [Upscale Video node](/upscale-video).
## What to do next
Turn a long video into short, ready-to-post clips.
Learn how credits are calculated for video tools.
This documentation is built and hosted on [Mintlify](https://mintlify.com), a developer documentation platform.
Hover over **Generate** to see the total credit cost for your settings, then click **Generate**. The upscaled video appears in **History**.
You can also upscale videos inside a workflow with the [Upscale Video node](/upscale-video).
## What to do next
Turn a long video into short, ready-to-post clips.
Learn how credits are calculated for video tools.
This documentation is built and hosted on [Mintlify](https://mintlify.com), a developer documentation platform.