> ## Documentation Index
> Fetch the complete documentation index at: https://docs.imagine.art/llms.txt
> Use this file to discover all available pages before exploring further.
# Quick Mode
> Generate images, videos, audio, and ads from a single prompt bar in Workflows, without building nodes.
**Quick Mode** lets you generate from a single prompt bar on the Workflows canvas. You type a prompt, pick a model, and generate. You don't add or connect any nodes.
Use Quick Mode for one-step generations, like a single image or a short video clip. Switch to node mode when you need to chain models into a multi-step pipeline.
## Switch modes
The mode switcher sits at the right end of the bottom toolbar. It has three buttons:
| Button | Mode | What it does |
| - | - | - |
| Nodes icon | **Node mode** | The full canvas with nodes and connections |
| Lightning bolt | **Quick Mode** | A single prompt bar for one-step generations |
| Chat bubble | **Agent mode** | Switches the canvas to agent mode |
Hover a button to see its name, then click it to switch.
 Both modes work on the same project. In Quick Mode, the canvas shows your outputs without the nodes and connections. Switch back to node mode to see the full graph.
In Quick Mode, the left sidebar shows only **Content**, **Assets**, and **Presets**.
## Generate in Quick Mode
Go to [imagine.art/flow](https://www.imagine.art/flow) and open a project or create a new one.
Click the lightning bolt in the mode switcher at the bottom right.
In the bottom toolbar, click **Image**, **Video**, **Audio**, or **Ad Maker**. The prompt bar opens with the inputs and settings for that type.
Both modes work on the same project. In Quick Mode, the canvas shows your outputs without the nodes and connections. Switch back to node mode to see the full graph.
In Quick Mode, the left sidebar shows only **Content**, **Assets**, and **Presets**.
## Generate in Quick Mode
Go to [imagine.art/flow](https://www.imagine.art/flow) and open a project or create a new one.
Click the lightning bolt in the mode switcher at the bottom right.
In the bottom toolbar, click **Image**, **Video**, **Audio**, or **Ad Maker**. The prompt bar opens with the inputs and settings for that type.
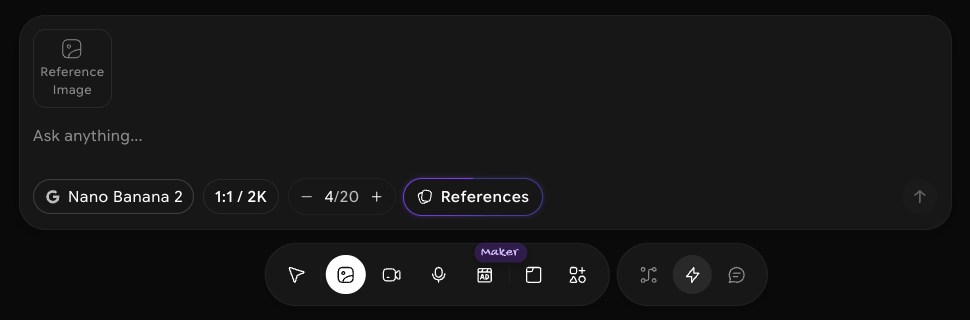 Describe what you want in the prompt field, add any reference media, and choose a model and output settings.
Click the arrow button at the right end of the prompt bar. Your results appear on the canvas.
## The prompt bar by type
Each type has its own inputs and settings. The available options change with the model you pick.
### Image
| Control | What it does |
| - | - |
| **Reference Image** | Upload an image to guide the generation |
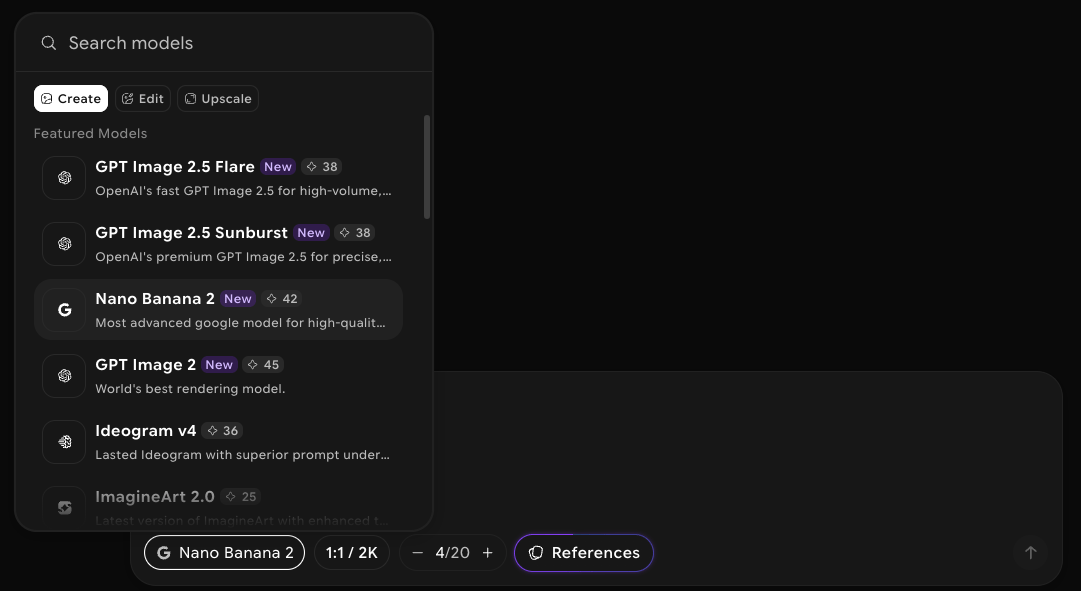
| Model | Choose the model. The picker has **Create**, **Edit**, and **Upscale** tabs, a search field, and the credit cost of each model |
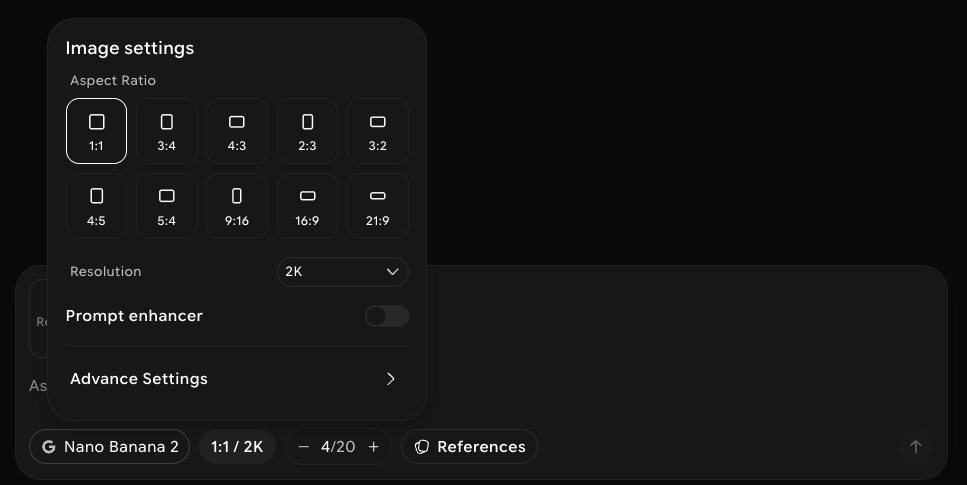
| Aspect ratio and resolution | Opens **Image settings**: aspect ratio, **Resolution**, the **Prompt enhancer** toggle, and **Advance Settings** for model-specific options |
| Generation count | How many images to generate in one run, from 1 to 20 |
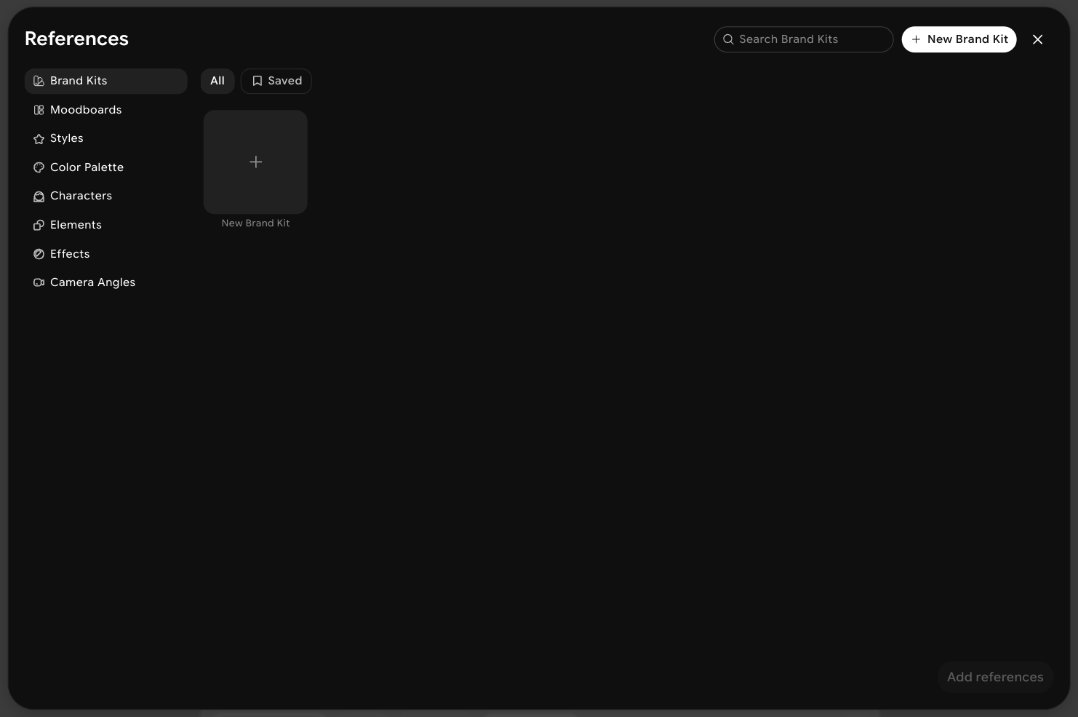
| **References** | Add saved references: **Brand Kits**, **Moodboards**, **Styles**, **Color Palette**, **Characters**, **Elements**, **Effects**, and **Camera Angles** |
Describe what you want in the prompt field, add any reference media, and choose a model and output settings.
Click the arrow button at the right end of the prompt bar. Your results appear on the canvas.
## The prompt bar by type
Each type has its own inputs and settings. The available options change with the model you pick.
### Image
| Control | What it does |
| - | - |
| **Reference Image** | Upload an image to guide the generation |
| Model | Choose the model. The picker has **Create**, **Edit**, and **Upscale** tabs, a search field, and the credit cost of each model |
| Aspect ratio and resolution | Opens **Image settings**: aspect ratio, **Resolution**, the **Prompt enhancer** toggle, and **Advance Settings** for model-specific options |
| Generation count | How many images to generate in one run, from 1 to 20 |
| **References** | Add saved references: **Brand Kits**, **Moodboards**, **Styles**, **Color Palette**, **Characters**, **Elements**, **Effects**, and **Camera Angles** |
 ### Video
| Control | What it does |
| - | - |
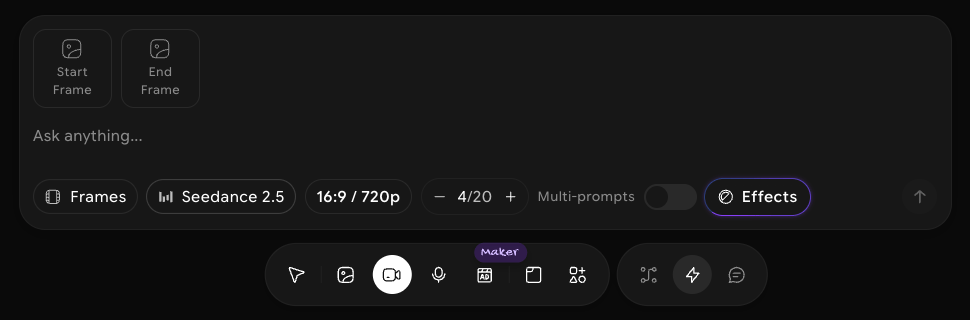
| **Frames** / **Reference** | Pick the input type. **Frames** gives you **Start Frame** and **End Frame** slots. **Reference** gives you **Reference Images**, **Reference Videos**, and **Reference Audio** slots |
| Model | Choose the video model |
| Aspect ratio and resolution | Set the output shape and quality, for example `16:9 / 720p` |
| Generation count | How many videos to generate in one run |
| **Multi-prompts** | Split the video into shots. Each shot gets its own prompt, and you add shots with **+** |
| **Effects** | Apply a video effect |
### Video
| Control | What it does |
| - | - |
| **Frames** / **Reference** | Pick the input type. **Frames** gives you **Start Frame** and **End Frame** slots. **Reference** gives you **Reference Images**, **Reference Videos**, and **Reference Audio** slots |
| Model | Choose the video model |
| Aspect ratio and resolution | Set the output shape and quality, for example `16:9 / 720p` |
| Generation count | How many videos to generate in one run |
| **Multi-prompts** | Split the video into shots. Each shot gets its own prompt, and you add shots with **+** |
| **Effects** | Apply a video effect |
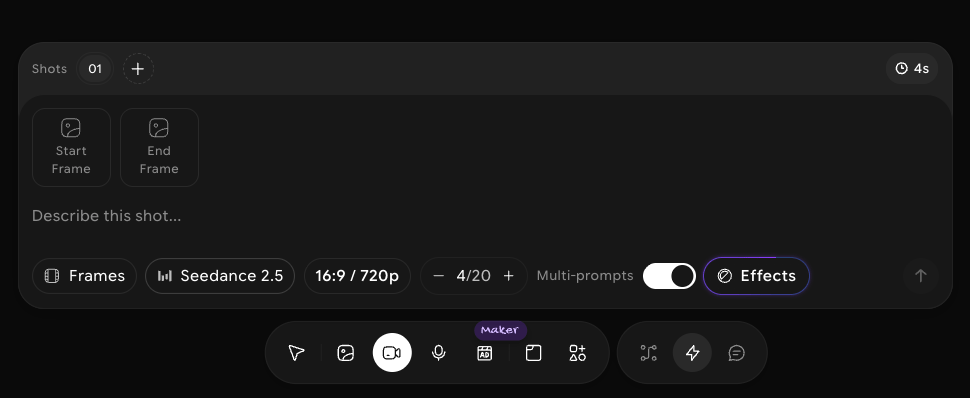
 With **Multi-prompts** on, a **Shots** row appears above the inputs. Each shot has its own prompt field, and the shot length shows on the right.
 ### Audio
| Control | What it does |
| - | - |
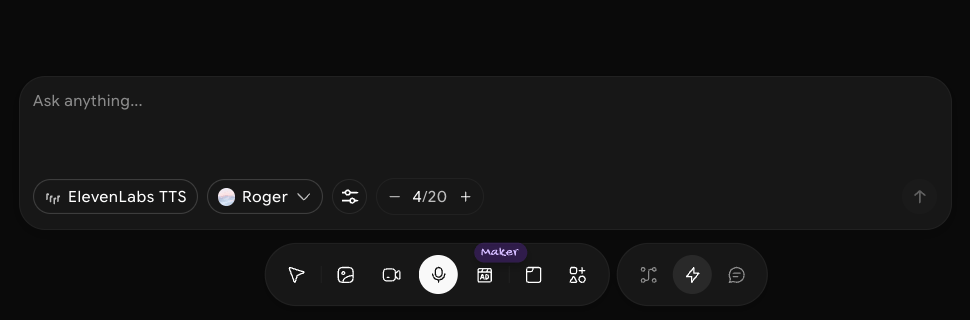
| Model | Choose the audio model, for example **ElevenLabs TTS** |
| Voice | Pick the voice for text to speech |
| Settings | Opens more settings for the selected model |
| Generation count | How many clips to generate in one run |
### Audio
| Control | What it does |
| - | - |
| Model | Choose the audio model, for example **ElevenLabs TTS** |
| Voice | Pick the voice for text to speech |
| Settings | Opens more settings for the selected model |
| Generation count | How many clips to generate in one run |
 ### Ad Maker
| Control | What it does |
| - | - |
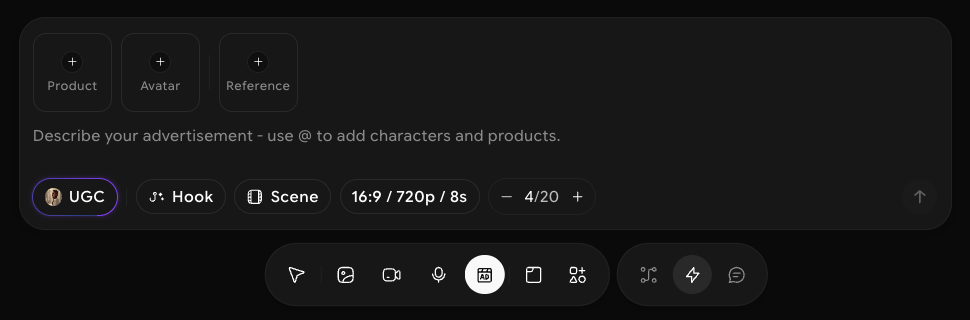
| **Product**, **Avatar**, **Reference** | Add your product, a presenter, and reference media |
| Prompt | Describe the ad. Type `@` to add characters and products |
| Format | Pick the ad format, for example **UGC** |
| **Hook** and **Scene** | Choose the opening hook and the setting |
| Output settings | Set the aspect ratio, resolution, and length, for example `16:9 / 720p / 8s` |
| Generation count | How many ads to generate in one run |
### Ad Maker
| Control | What it does |
| - | - |
| **Product**, **Avatar**, **Reference** | Add your product, a presenter, and reference media |
| Prompt | Describe the ad. Type `@` to add characters and products |
| Format | Pick the ad format, for example **UGC** |
| **Hook** and **Scene** | Choose the opening hook and the setting |
| Output settings | Set the aspect ratio, resolution, and length, for example `16:9 / 720p / 8s` |
| Generation count | How many ads to generate in one run |
 ## Work with results
Results appear as cards on the canvas. Click an image to select it and use the quick actions on the card: **Animate**, **Edit**, and **Upscale**.
## Quick Mode or node mode?
| | Quick Mode | Node mode |
| - | - | - |
| Best for | Fast, single-step generations | Multi-step pipelines that chain models |
| How you work | One prompt bar | Nodes connected on the canvas |
| Settings | In the prompt bar | In each node and the right sidebar |
| Apps | Not available | Build and publish apps with [App Builder](/workflows/app-builder) |
A common pattern is to explore ideas in Quick Mode, then switch to node mode to build a repeatable pipeline around the result you like.
The generation count multiplies the cost of a run. Keep it low while you test prompts, then raise it once you like the direction.
## Related pages
* [Canvas Interface](/workflows/canvas-interface)
* [Canvas Navigation](/workflows/canvas-navigation)
* [Understanding Nodes](/workflows/understanding-nodes)
This documentation is built and hosted on [Mintlify](https://mintlify.com), a developer documentation platform.
## Work with results
Results appear as cards on the canvas. Click an image to select it and use the quick actions on the card: **Animate**, **Edit**, and **Upscale**.
## Quick Mode or node mode?
| | Quick Mode | Node mode |
| - | - | - |
| Best for | Fast, single-step generations | Multi-step pipelines that chain models |
| How you work | One prompt bar | Nodes connected on the canvas |
| Settings | In the prompt bar | In each node and the right sidebar |
| Apps | Not available | Build and publish apps with [App Builder](/workflows/app-builder) |
A common pattern is to explore ideas in Quick Mode, then switch to node mode to build a repeatable pipeline around the result you like.
The generation count multiplies the cost of a run. Keep it low while you test prompts, then raise it once you like the direction.
## Related pages
* [Canvas Interface](/workflows/canvas-interface)
* [Canvas Navigation](/workflows/canvas-navigation)
* [Understanding Nodes](/workflows/understanding-nodes)
This documentation is built and hosted on [Mintlify](https://mintlify.com), a developer documentation platform.