Getting Started with Workflows
Using Workflows is intuitive and powerful. If you’re new to node-based AI design, here are three ways to get started:Start with Presets
Use pre-configured presets for common tasks without manual setup.
Use Featured Workflows
Browse curated workflows designed for specific use cases.
Build from Scratch
Create custom workflows with complete creative control.
Option 1: Start with Presets on Canvas
Presets are the quickest way to get started without manually adding each node. These pre-configured presets cover common tasks and streamline your workflow. You can use them as-is or modify them to match your unique use case. Presets help you leverage the power of ImagineArt Workflow capabilities without needing to know the technical details. Here’s how you can use them:Step 1: Select a Preset
On your blank canvas, you’ll see placeholder options like Get Prompt Ideas, Animate Image, Merge Styles, Edit Image, etc. These presets are designed to handle specific use cases with minimal effort.- Click on a Preset: When you click on any preset, it automatically adds the required nodes to the canvas, pre-configured and ready to go.
Step 2: Customize the Preset
Once the preset is loaded into the canvas, you can customize it to fit your needs:- Update the Prompt Node: In case the preset requires a specific prompt (e.g., for animating an image or generating art), modify the prompt text within the Prompt Node.
- Replace Input Image: For image-related presets (like Animate Image or Edit Image), click on the Input Image Node and upload your image.
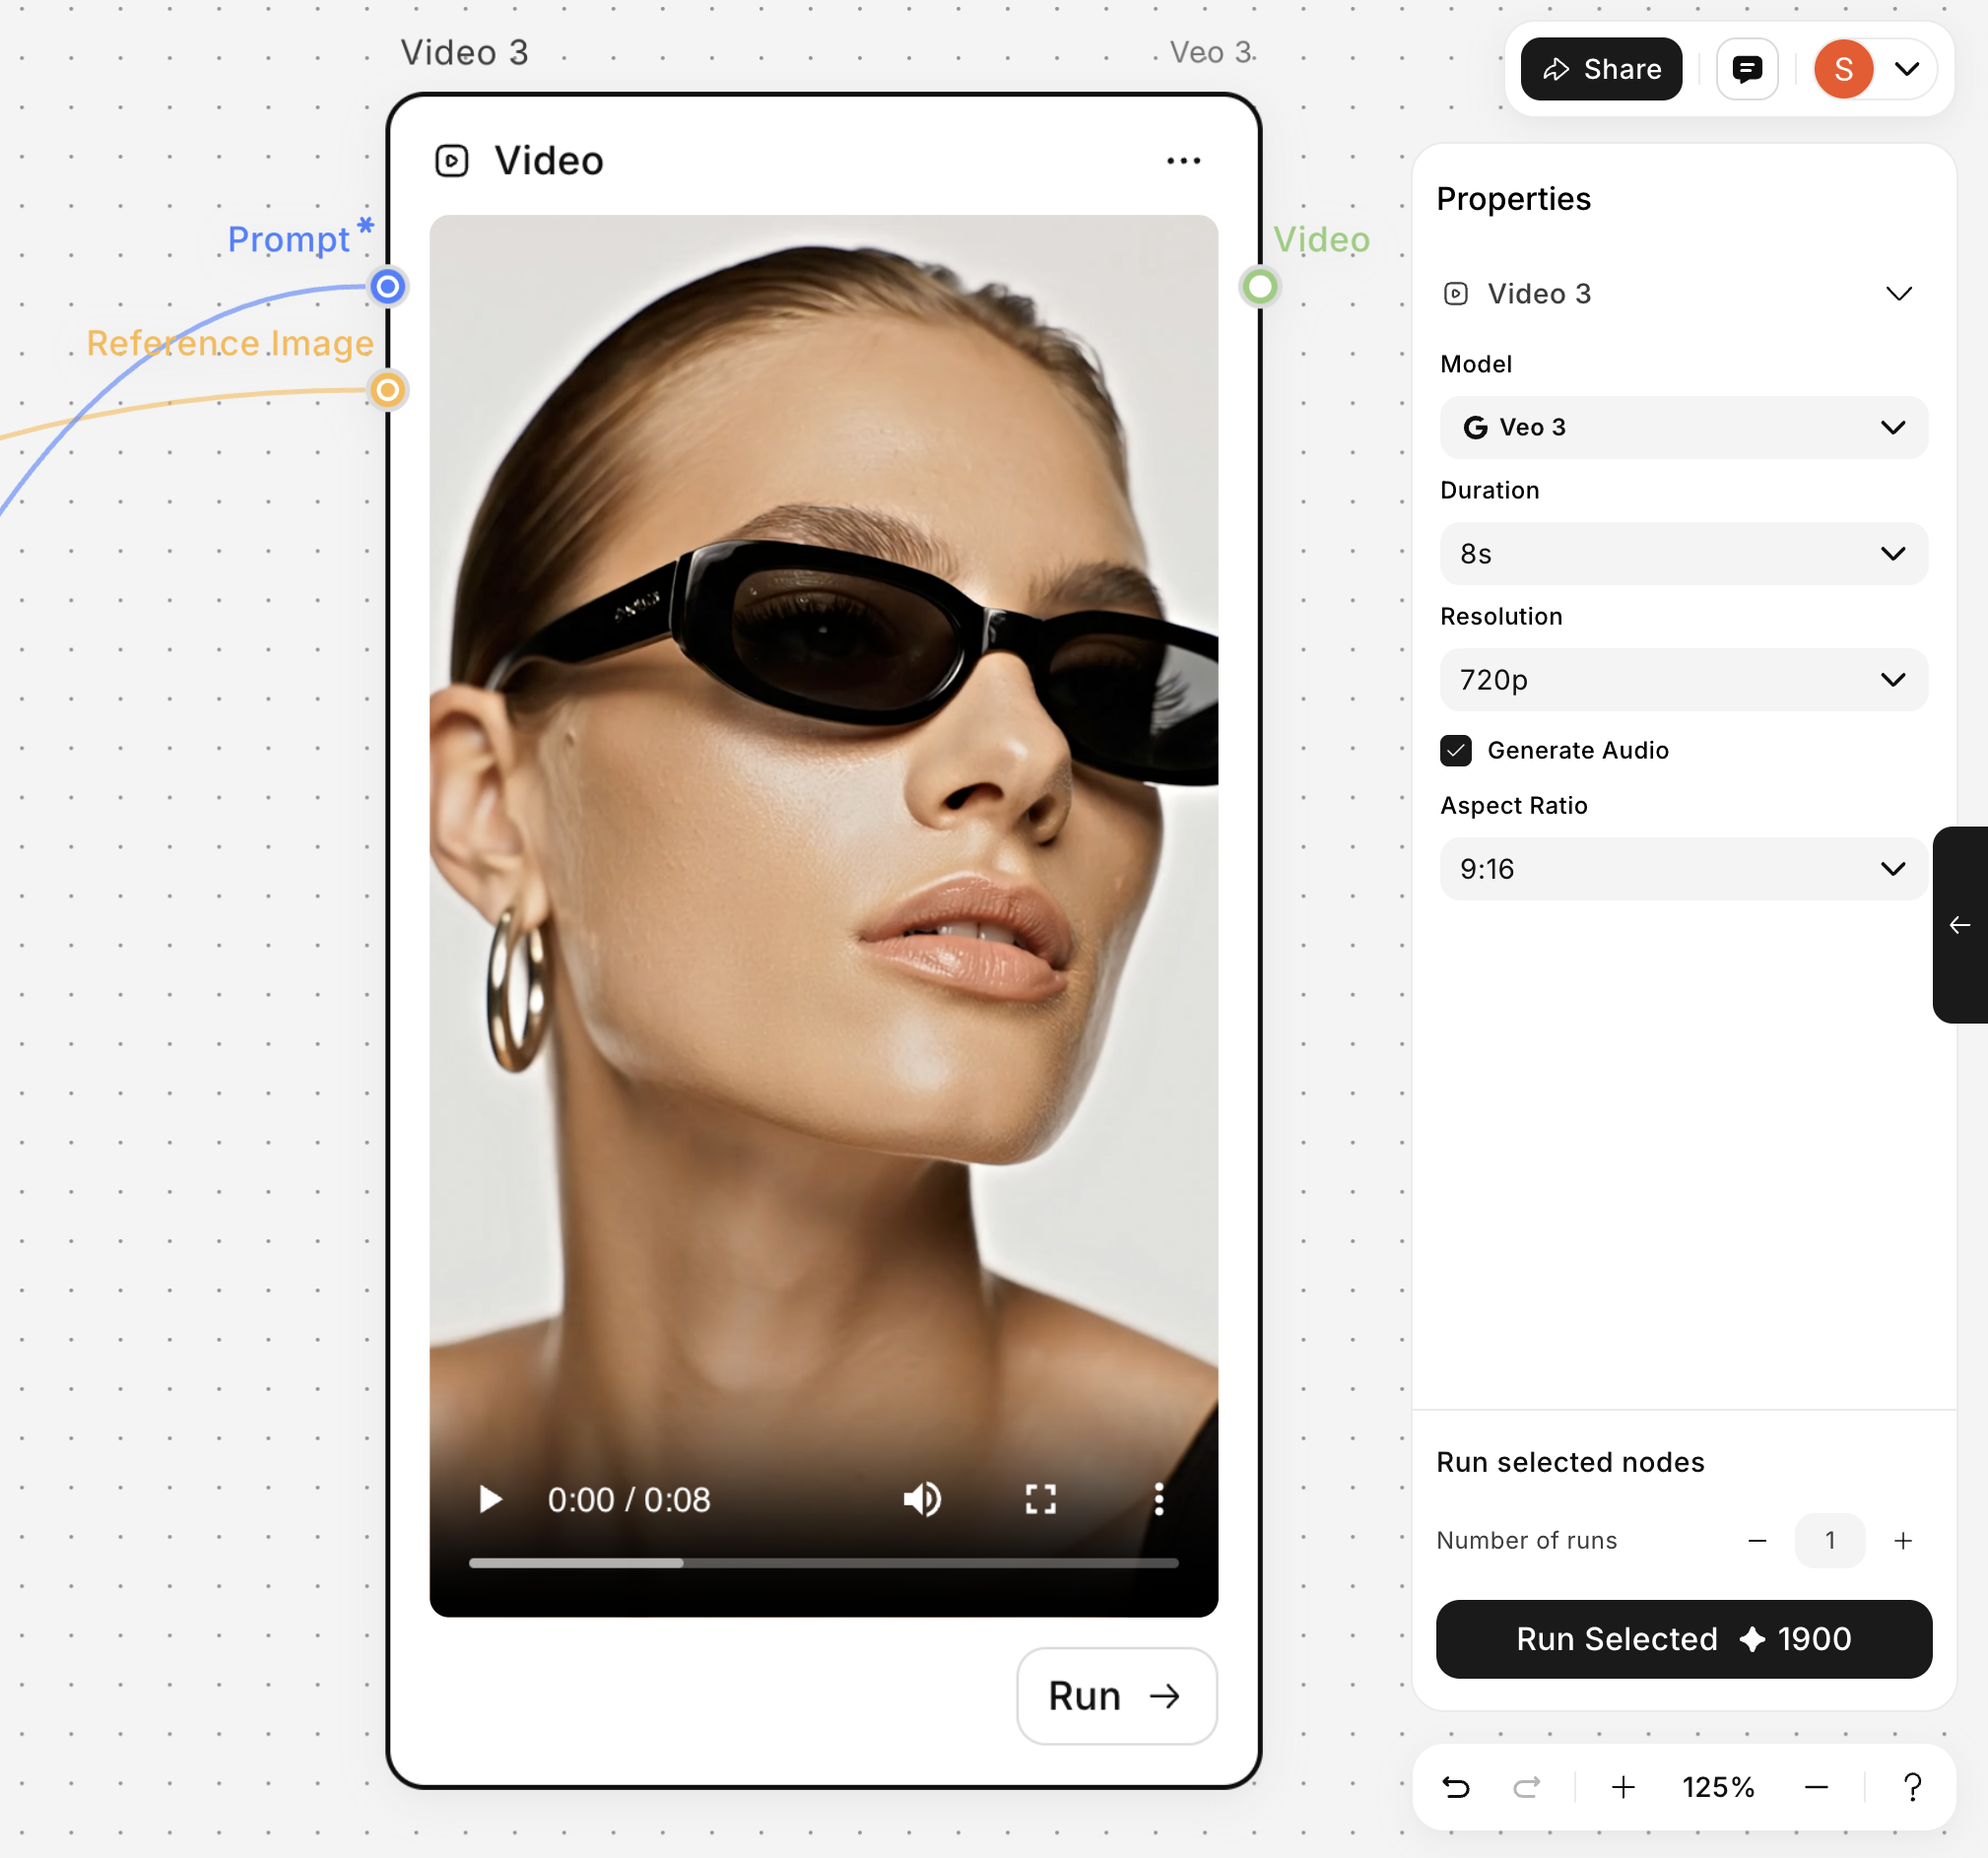
Step 3: Run the Workflow
Once you customize preset inputs:- Click the Run → button in the node, or in the right panel under node settings.
- Alternatively, select all nodes and press Ctrl/Cmd + Enter to run the entire workflow.
Option 2: Start from Featured Workflows
The second fastest way to get started is using our curated workflows.Step 1: Choose a Workflow
Browse featured workflows on the dashboard designed for common use cases:
- Ad Placement
- Product Photoshoot
- Photo Composer
- Camera Angle Ideation
- Virtual Try on
Step 2: Duplicate Workflow
Click on any workflow to load and duplicate it. All nodes and models are pre-configured and ready to use.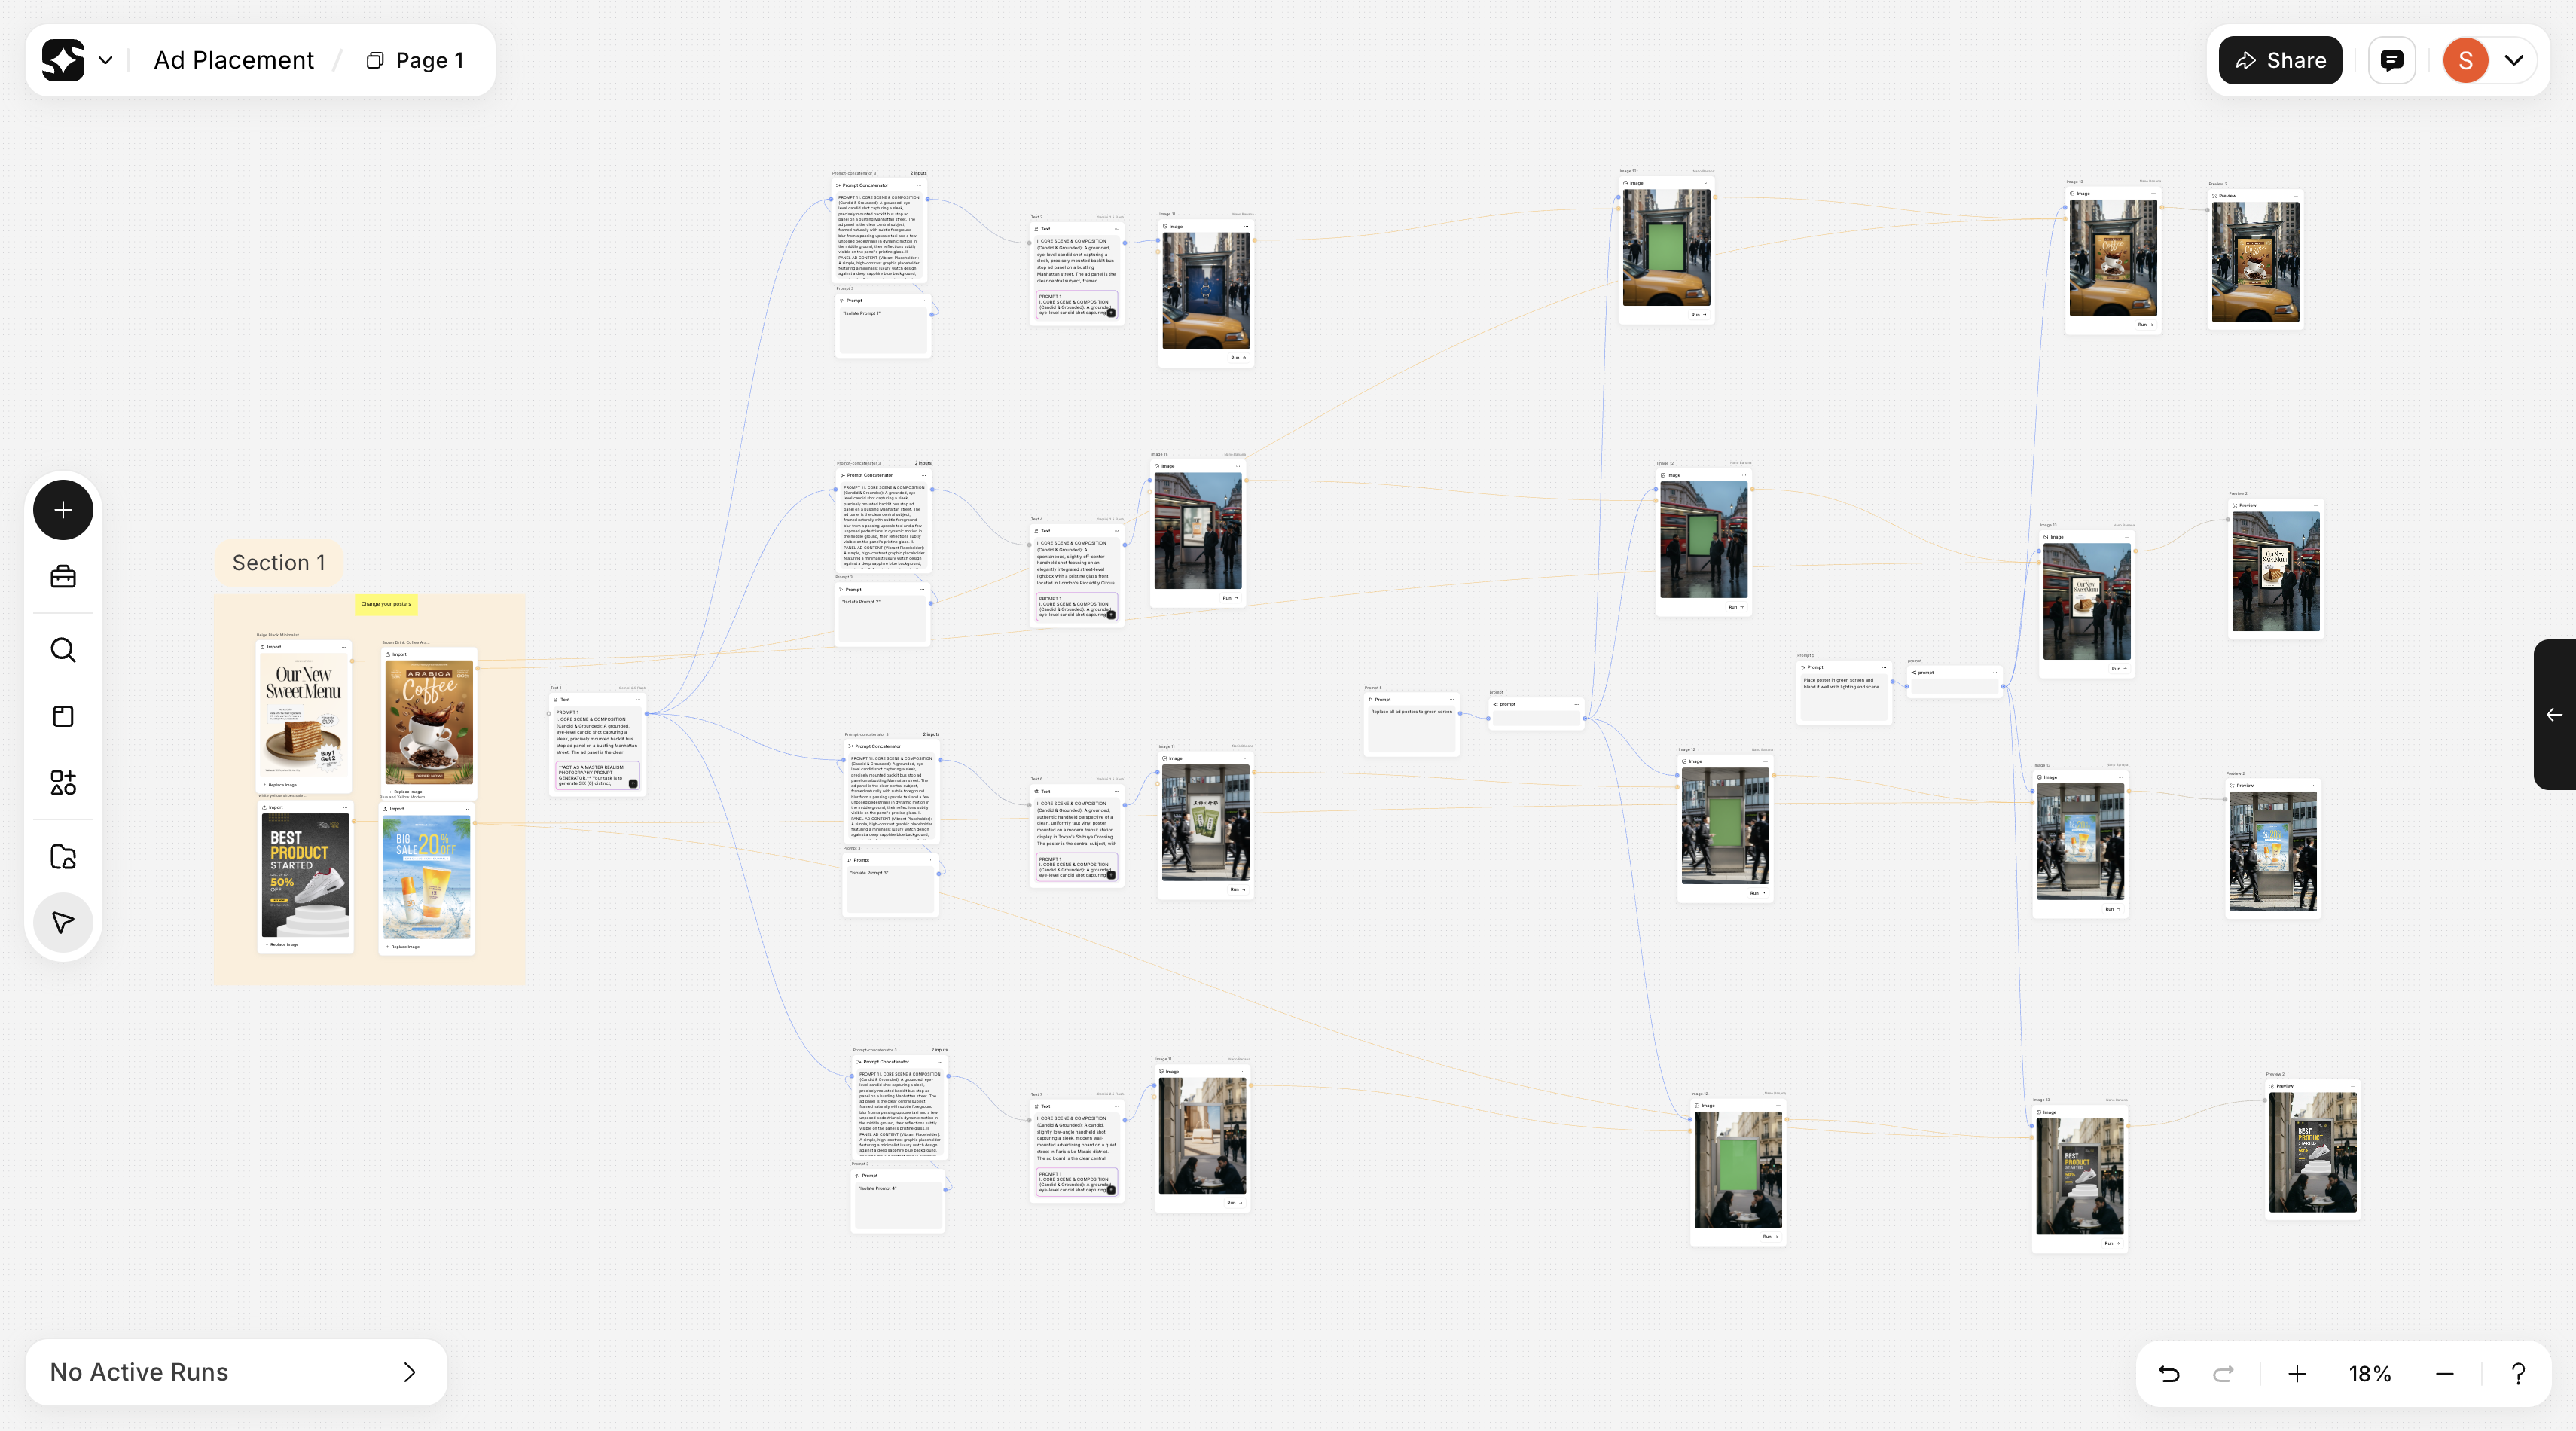
- Update the prompt in the
Promptnode - Or upload/replace an image in the
Importnode (if the workflow requires input)
Step 3: Run the Workflow
If everything is loaded correctly, click the Run → button in the node or in the right panel of node settings, or select all and pressCtrl/Cmd + Enter.
Your generated content will appear in the image/video node on the canvas, depending on the workflow you’re running.
Option 3: Build From Scratch
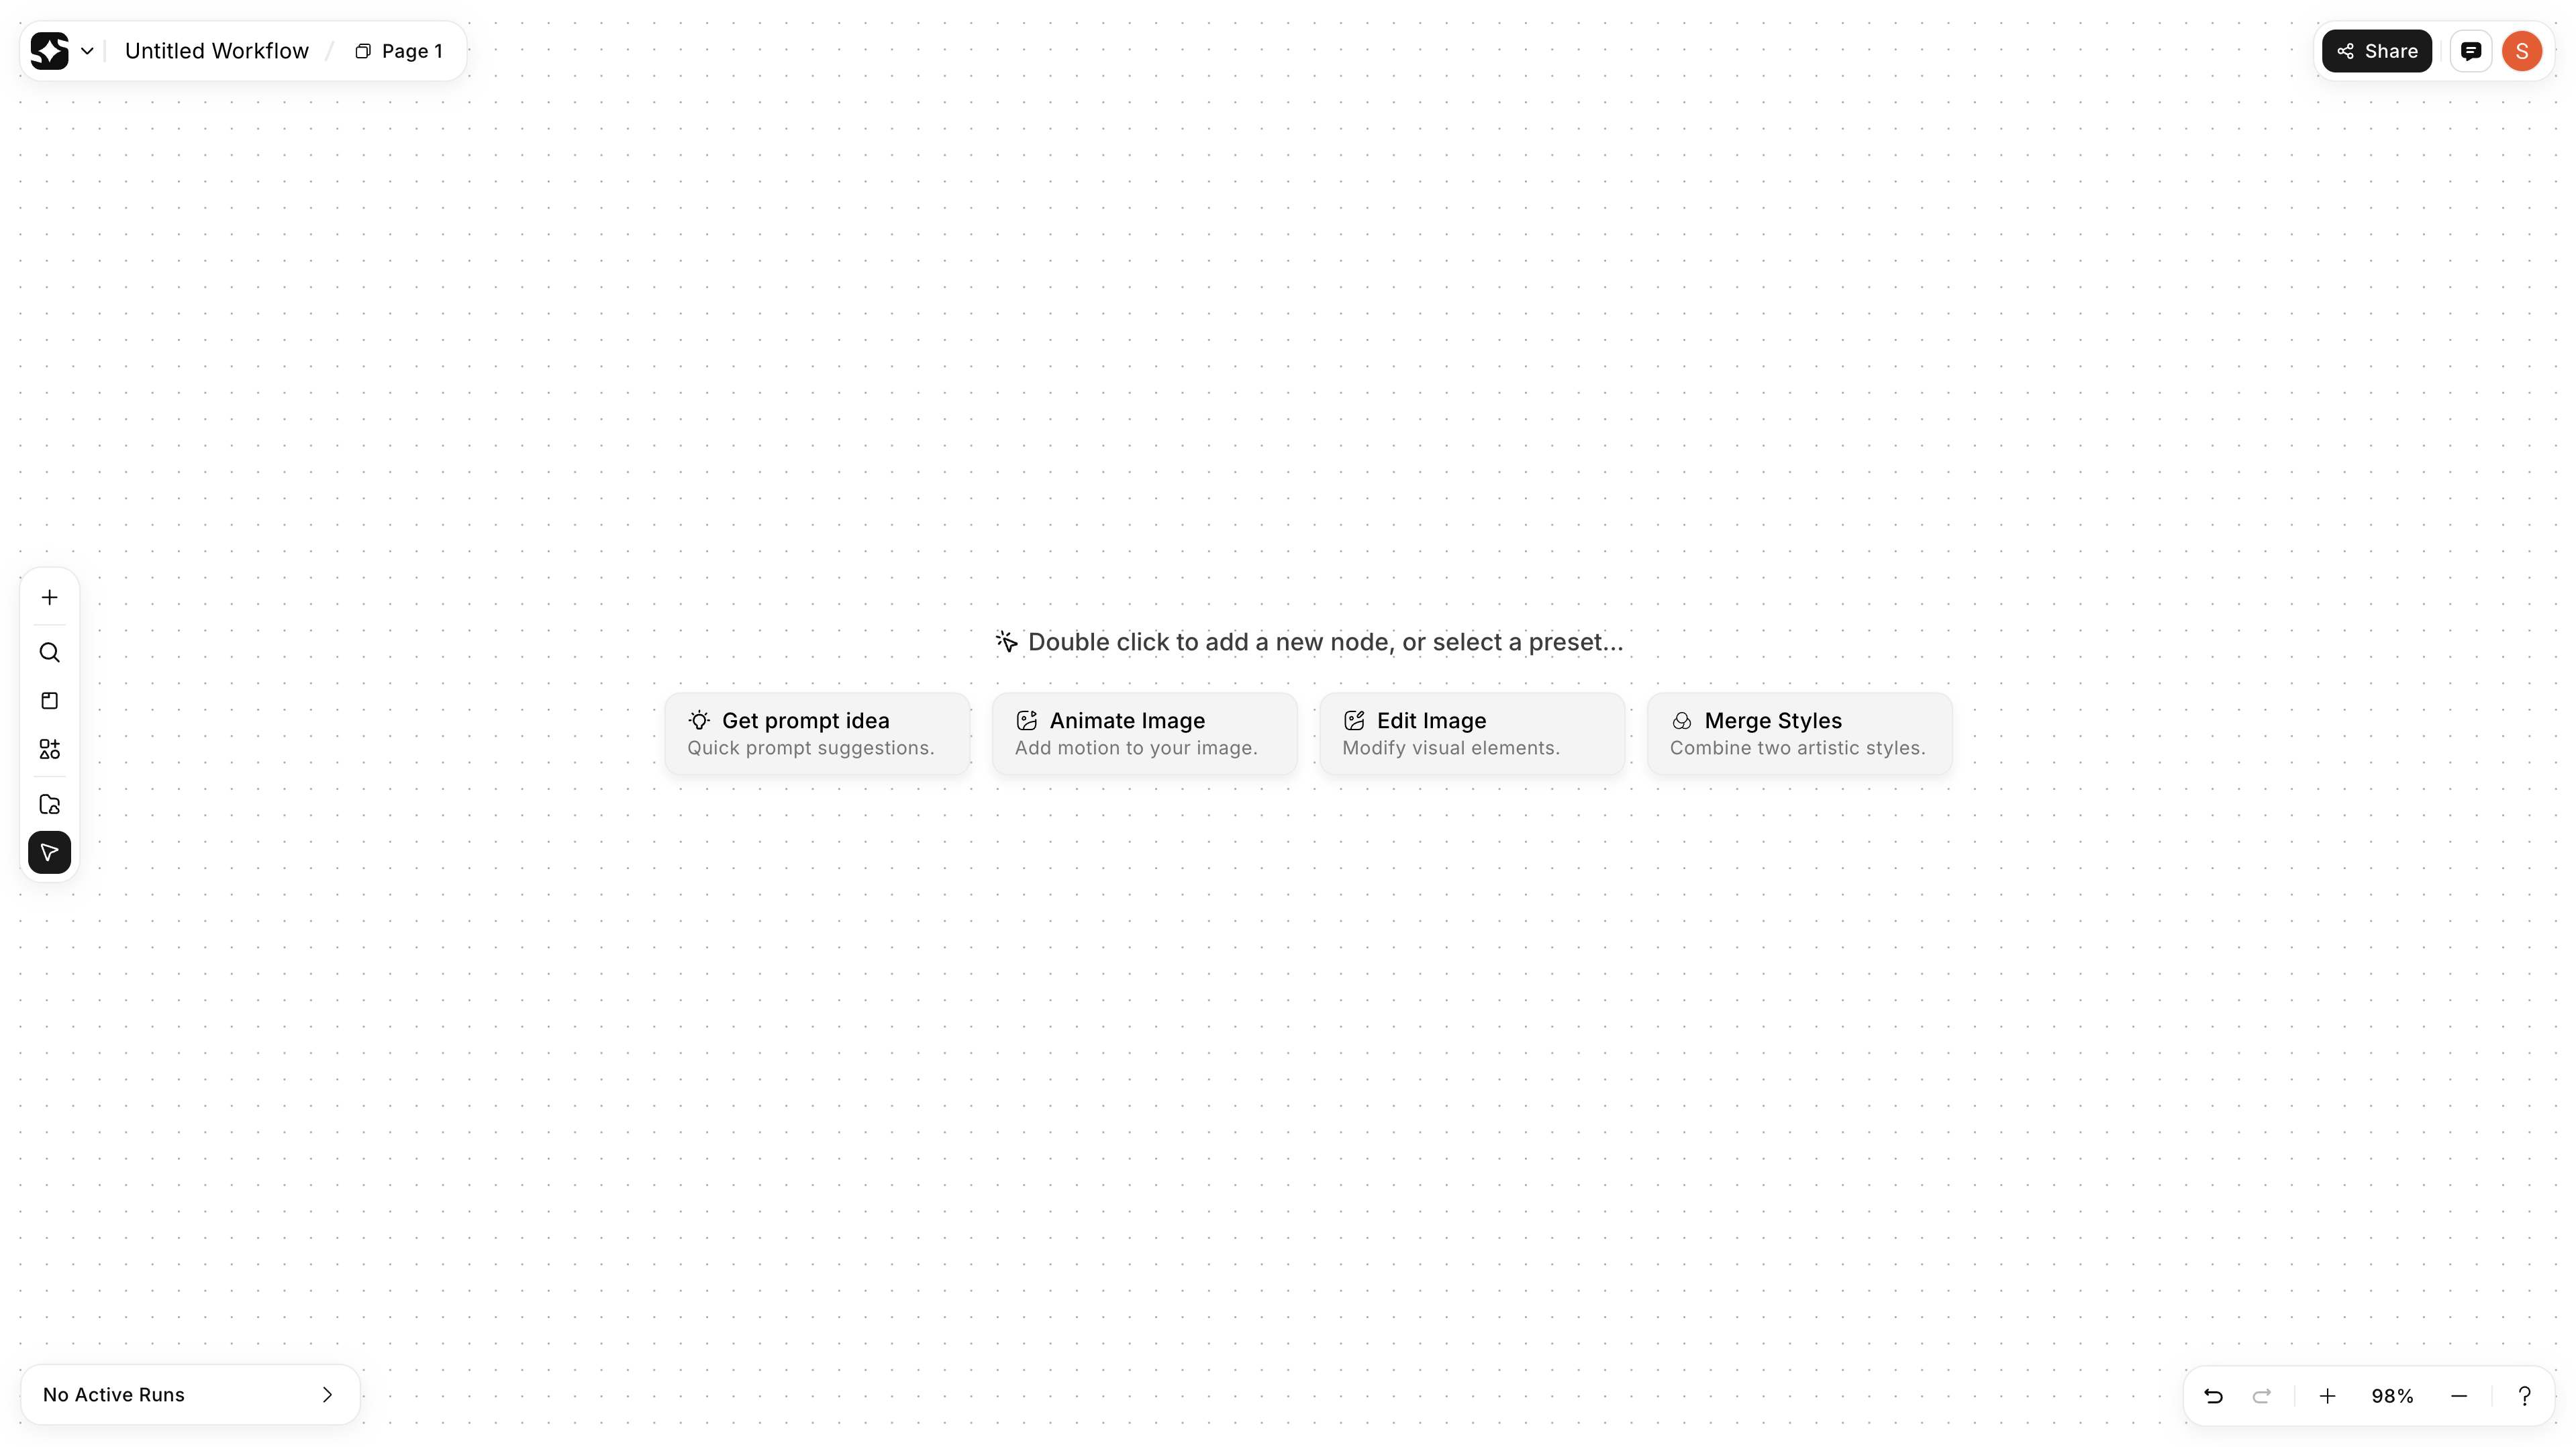
For complete creative control, start with a blank canvas.Step 1: Open Blank Canvas
- Click on Create new workflow in the dashboard
Step 2: Add Your First Node
- Press
double-clickanywhere on the canvas.
.png?alt=media&token=d92f6657-563f-4e1f-8410-3e1e6024f2a1)
- Alternatively, click the + button in the left panel to add the required nodes (Text, Prompt, Image, or Video).
.png?alt=media&token=86f970be-78ba-47ba-9dcc-fcc4884e4212)
- For a quick search, press Cmd + K and search for any node (e.g., “Image”, “Video”, “Prompt”), or search by AI model name (e.g., “Veo 3”, “Nano Banana”).
Step 3: Add Required Input Nodes
- Click on the visible node to add it to the canvas (e.g., Text or Image node). Write your prompt in it.
- Connect the Text or Prompt node to the Image or Video node, depending on your setup.
Step 4: Generate
- Click Run → and watch your creation appear in real time.