

1
Switch to Video mode
From the Editorial or Catalog Shoot editor, click Video under Mode. Configure the shot from: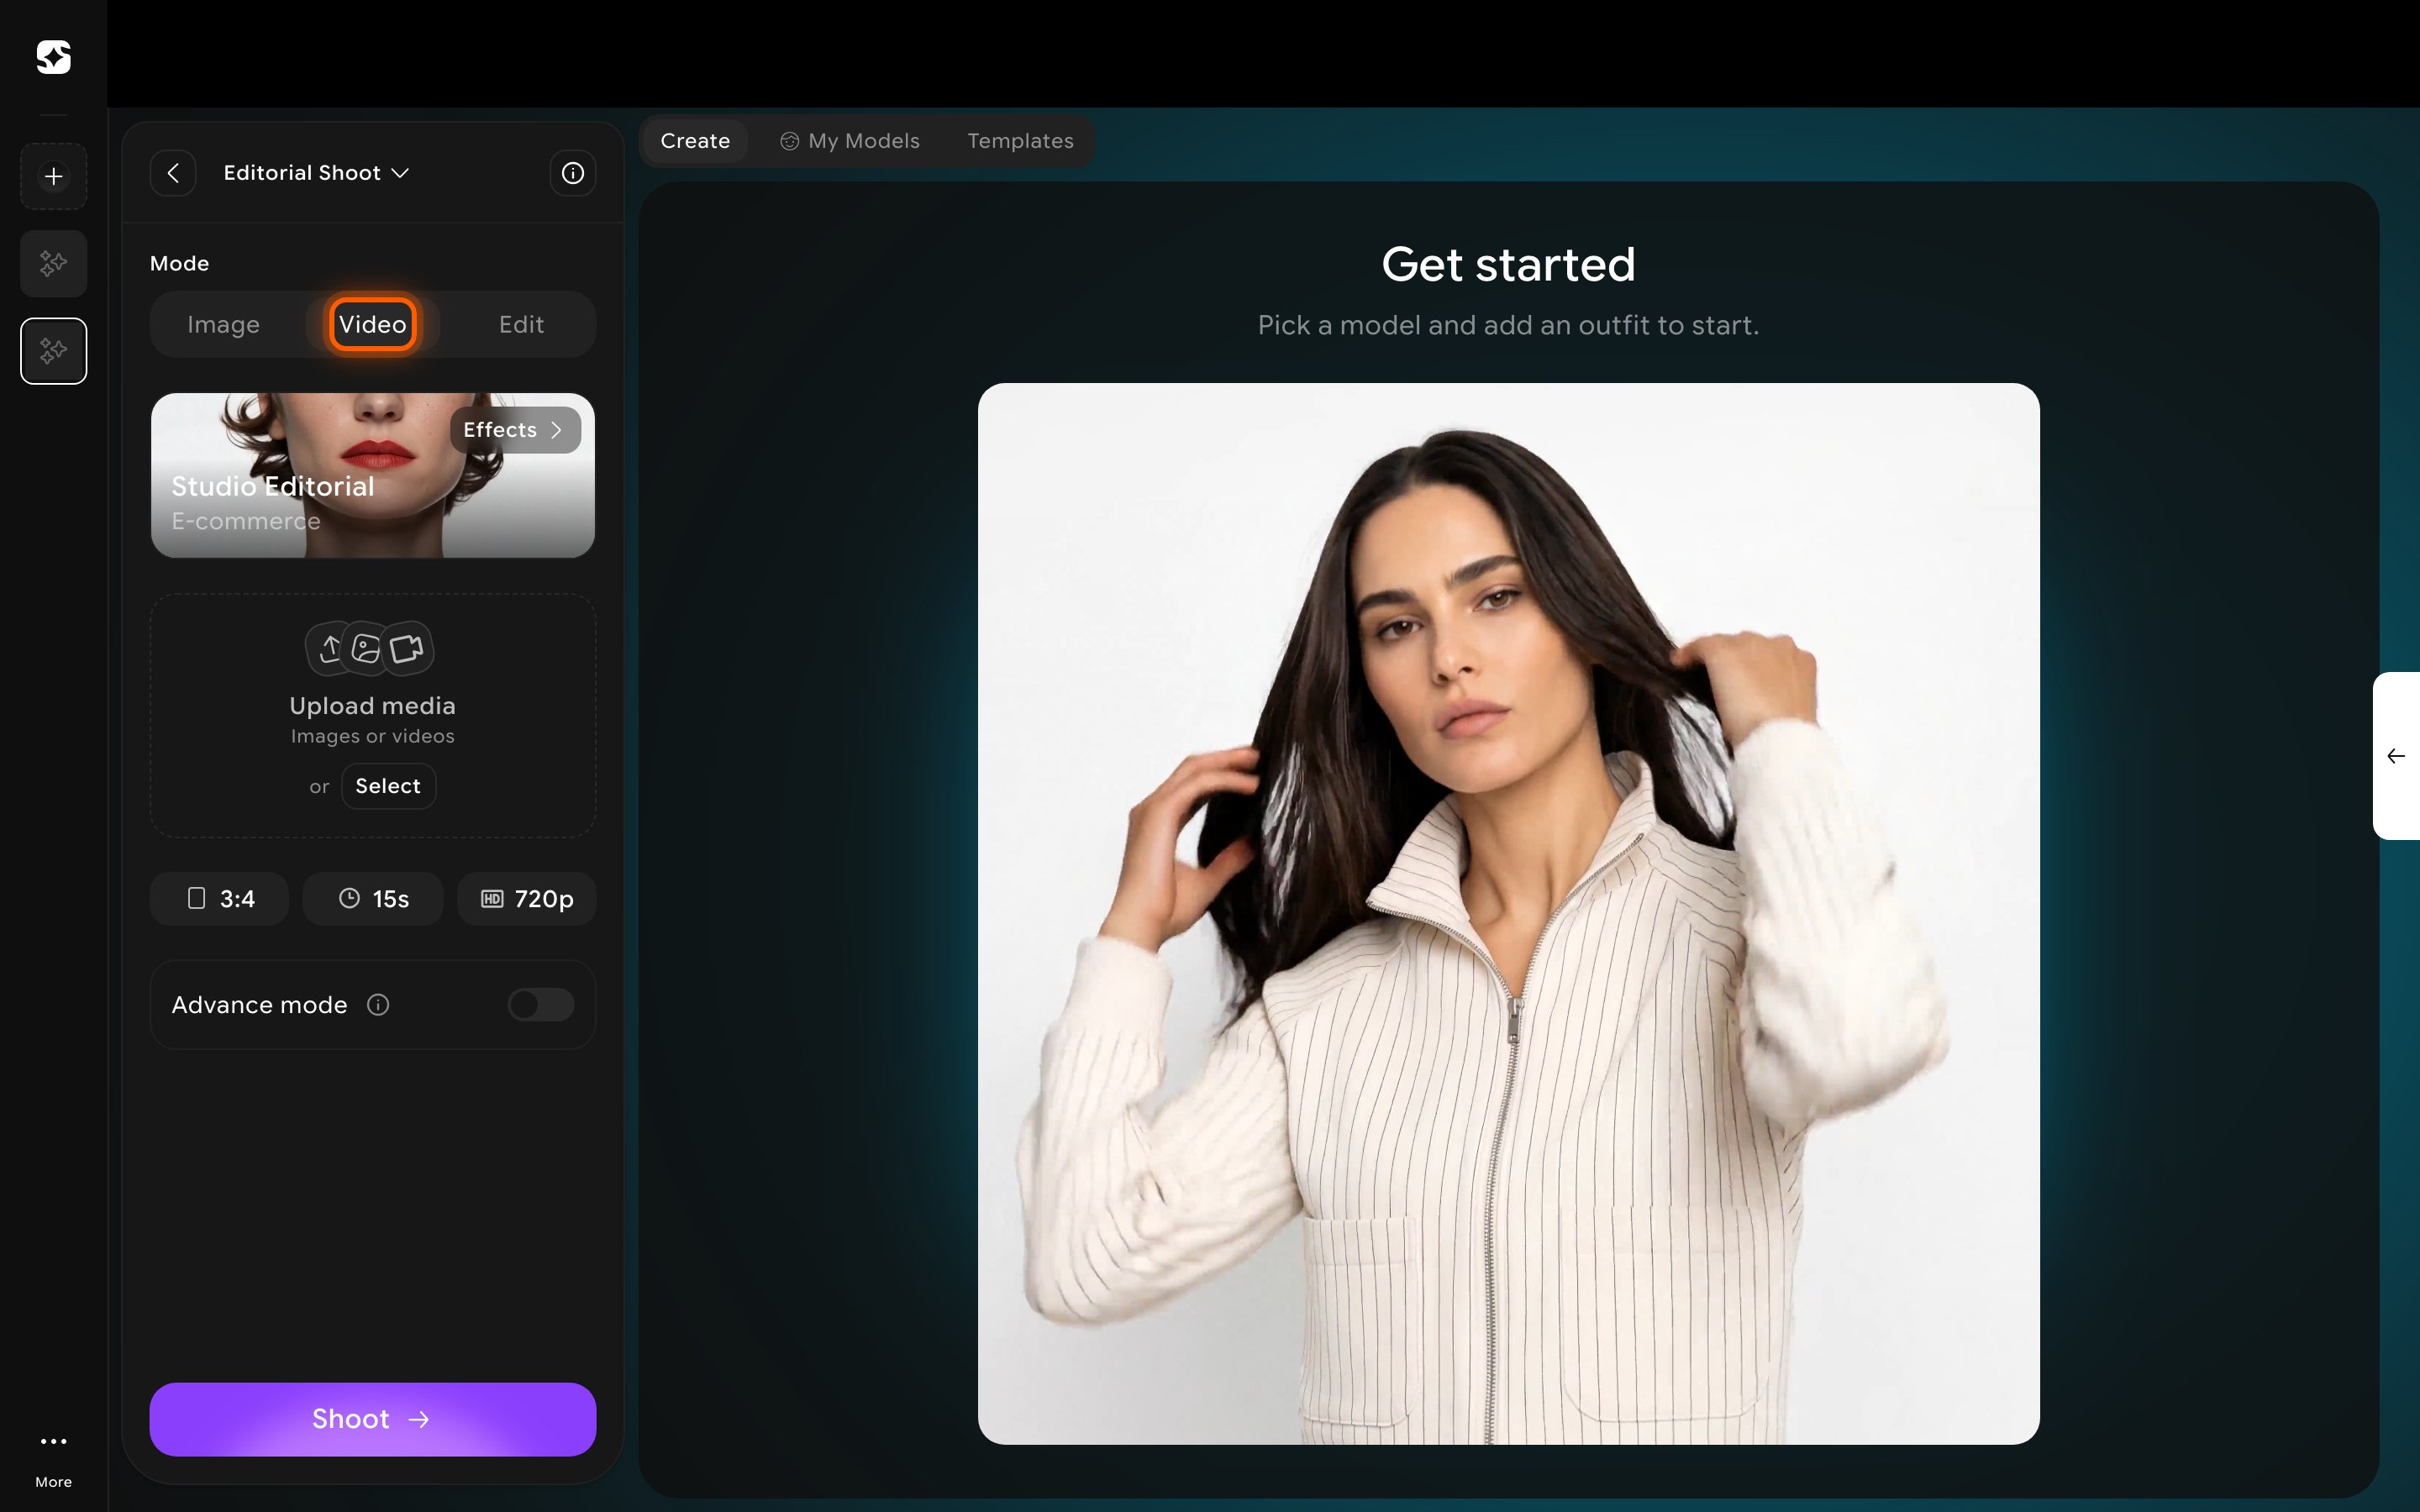
- Effects — a preset style for the video (e.g. “Studio Editorial — E-commerce”).
- Upload media — the starting image or video the clip is generated from.
- Aspect ratio, Duration, and Resolution pills (defaults: 3:4, 15s, 720p).
2
Turn on Advance mode for finer control
Turning on Advance mode adds a Camera movement setting (default: Auto) and an optional Describe your shot text field, for when you want more control than the Effects preset gives you.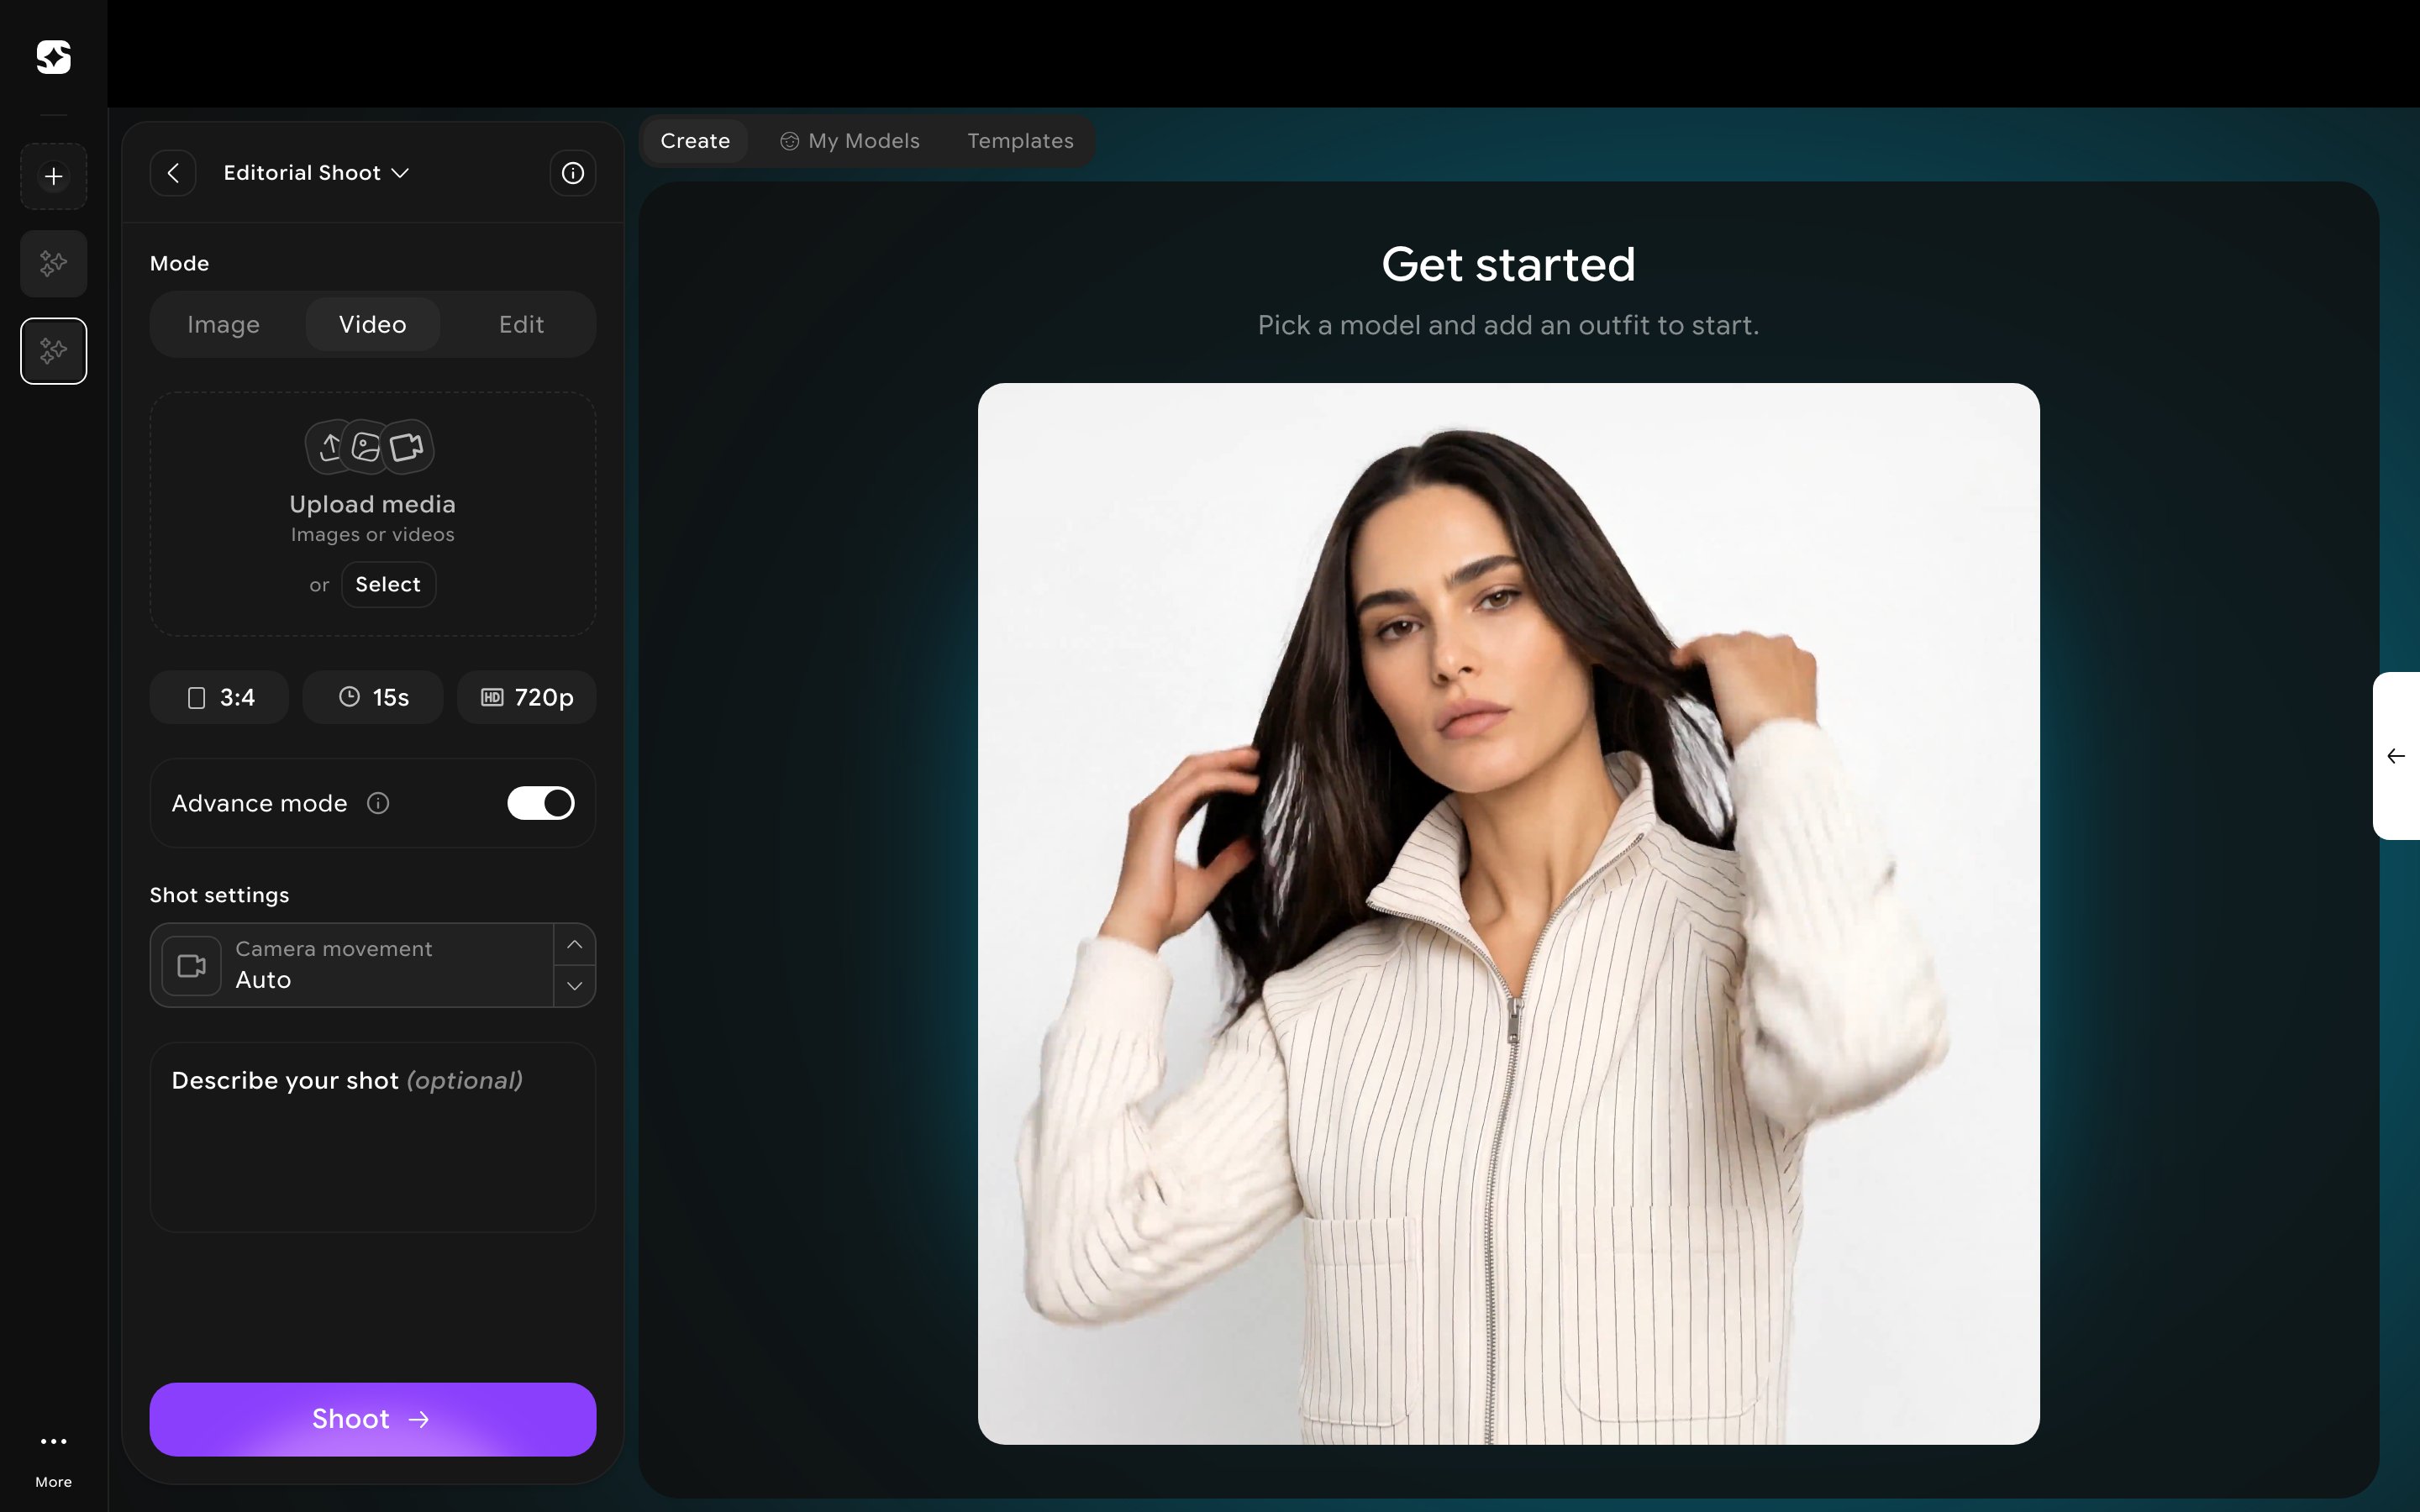
Video mode works identically in Editorial and Catalog shoots — same Effects preset, same defaults, same Advance mode controls. Only the panel title changes.