

Two ways to start: Upload or Generate
When you open the Image tab, you have two starting points:- Upload media. Use this when you already have an image you want to work with — a photograph, concept art, a frame from another video. Click Upload media in the optional media box and pick the file. You can also click Select to pull from media you have generated earlier in this project.

- Generate from a prompt. Skip the upload box and just write a description in the Prompt field. The system will create the image for you. Add reference media via Add media inside the prompt area if you want to influence style or composition.

Output controls — the three chips below the prompt
| Chip | What it controls | When to change it |
|---|---|---|
| 1/4 | Number of variations generated per click. Increase to compare options; decrease to save credits. | Increase when exploring; decrease when iterating on something you already like. |
| 16:9 | Aspect ratio. 16:9 is cinematic widescreen; portrait and square ratios also available. | Pick the ratio that matches the final delivery — social vertical, web horizontal, or print square. |
| 4K | Output resolution. Higher means more detail and a larger file. | Use 4K for final deliverables. Drop it lower for fast iteration. |
Storyboard mode
A storyboard is a sequence of frames that map out a film before you shoot it. Film Studio gives you a Storyboard toggle (just below the upload area on the Image tab) that lets you generate a full sequence of frames in one go, instead of generating each frame separately. When Storyboard is on, the system reads your prompt as a sequence of shots rather than a single frame, and produces a series of images that share a consistent style.
Saving & reusing presets
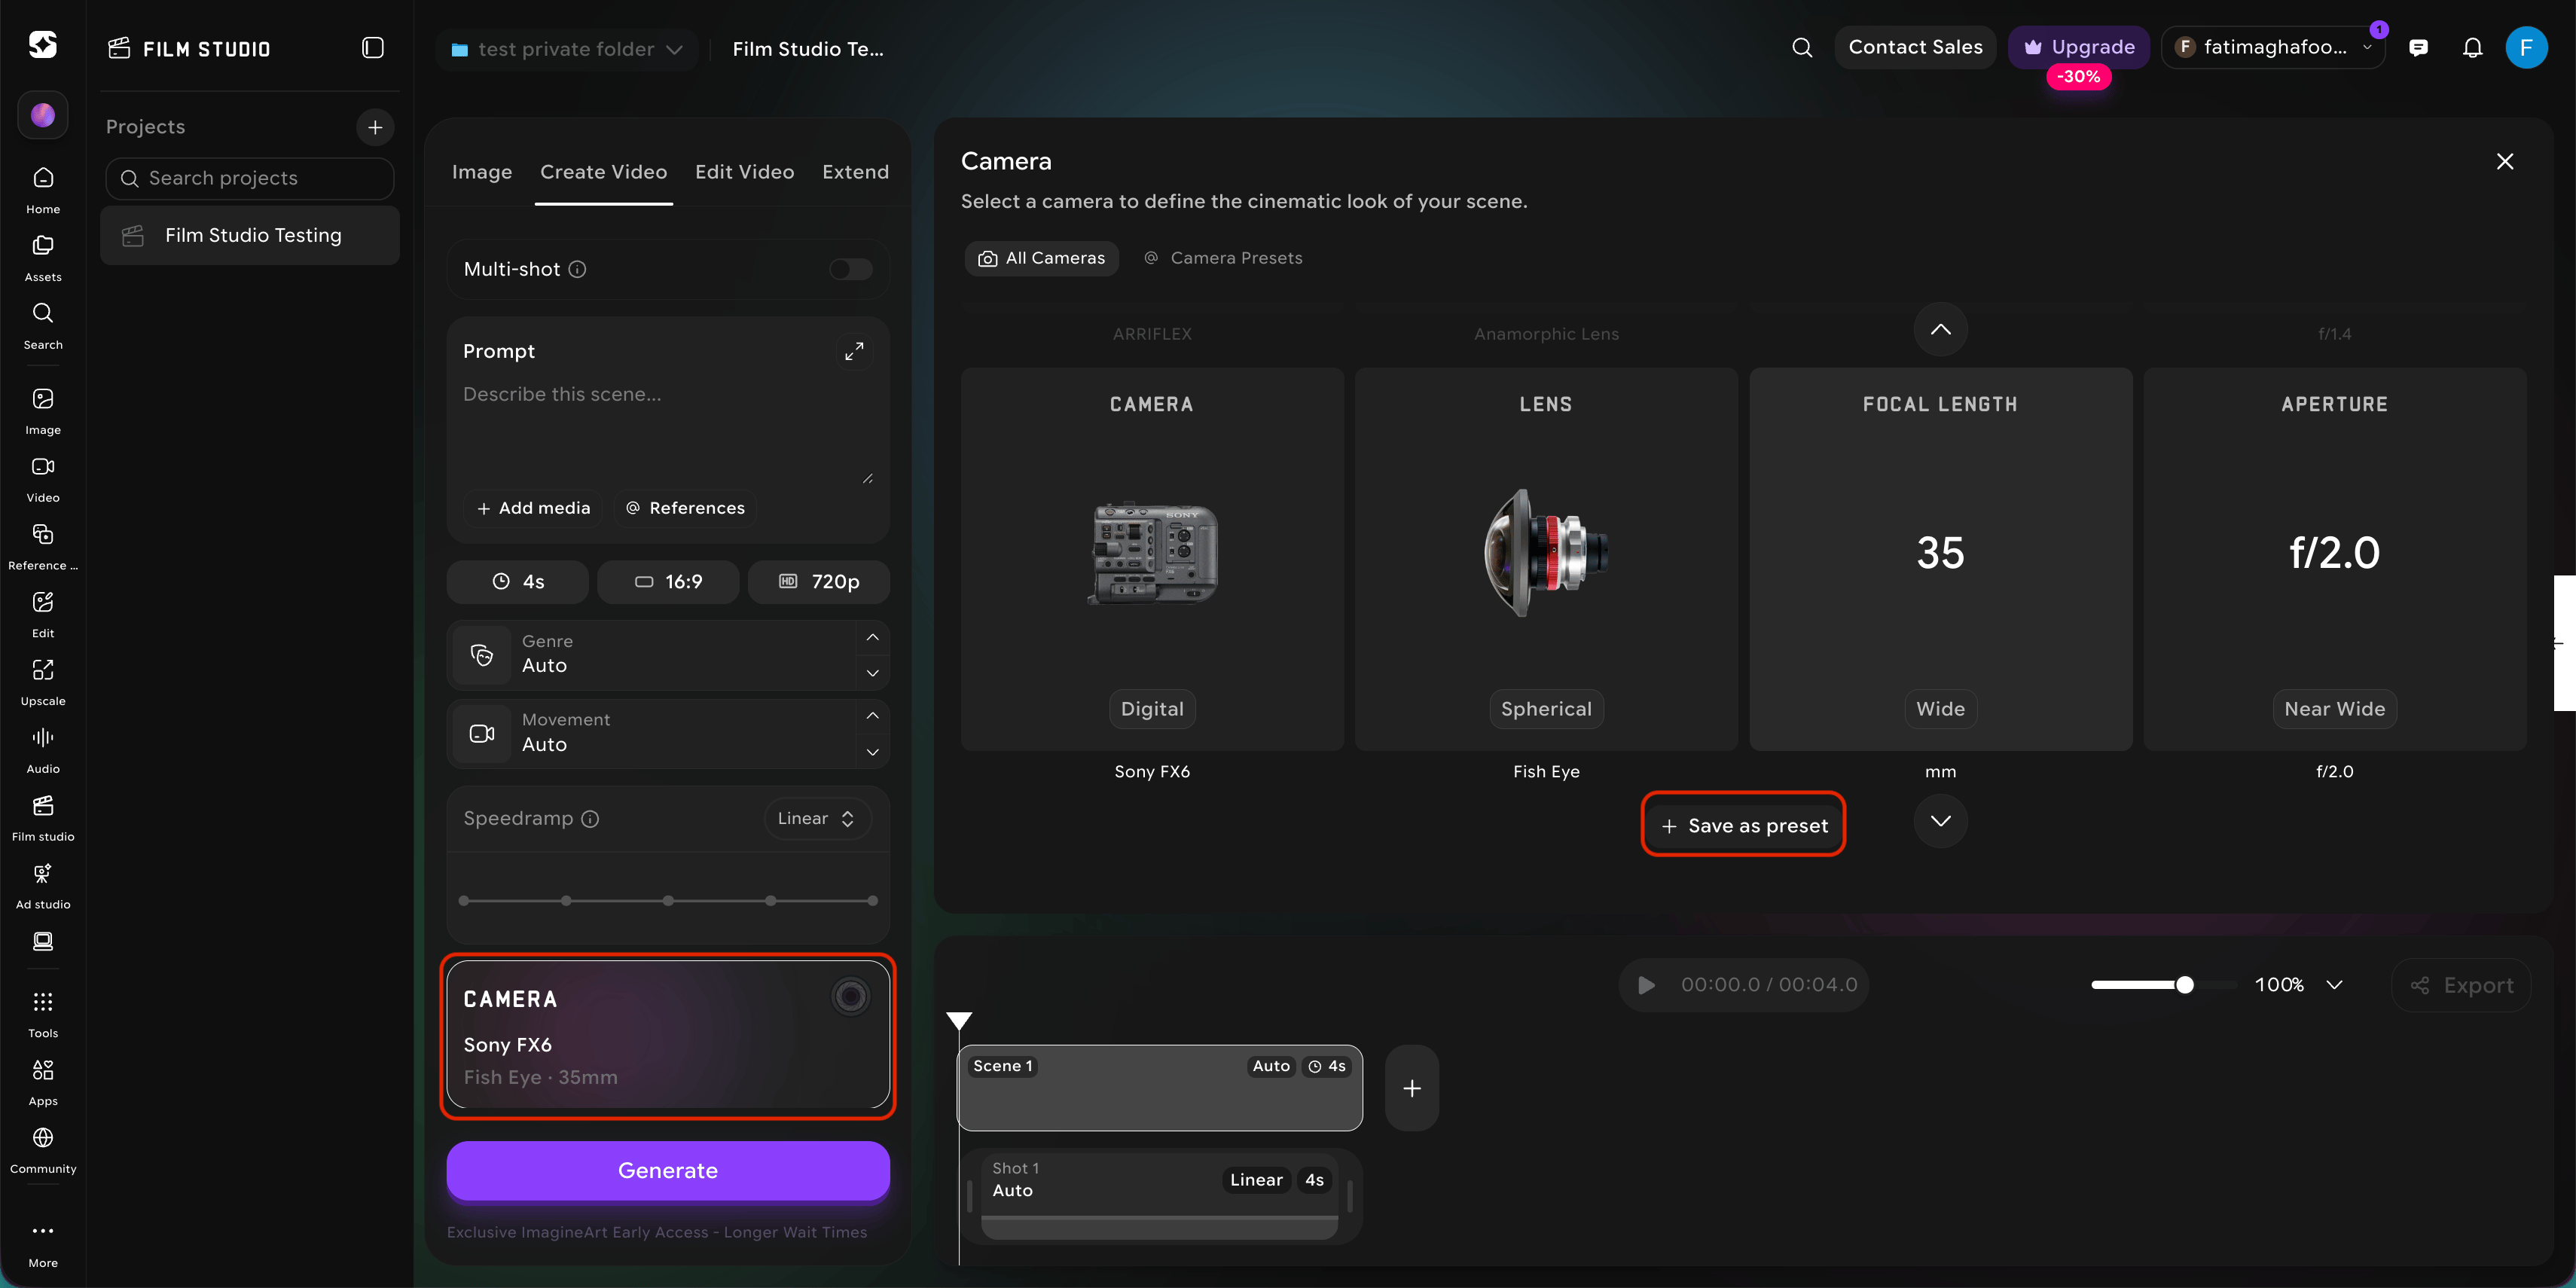
Consistency is the difference between a collection of nice images and a film. A preset captures camera, lens, focal length, and aperture under one name — apply it with a single click. Once you find a camera/lens/focal/aperture combination that works for your project, save it as a preset. A preset captures all four settings under a name you choose, so you can apply it again with one click on a future image or video — without having to remember what you picked. Saving presets matters because consistency is what makes a series of images feel like a film. If every frame of your project uses the same preset, your work will feel like it came from the same hand. Without that, even strong individual images can feel disconnected.How to save a preset
Set your camera values
In the Camera panel, set the four values (camera, lens, focal length, aperture) the way you want them.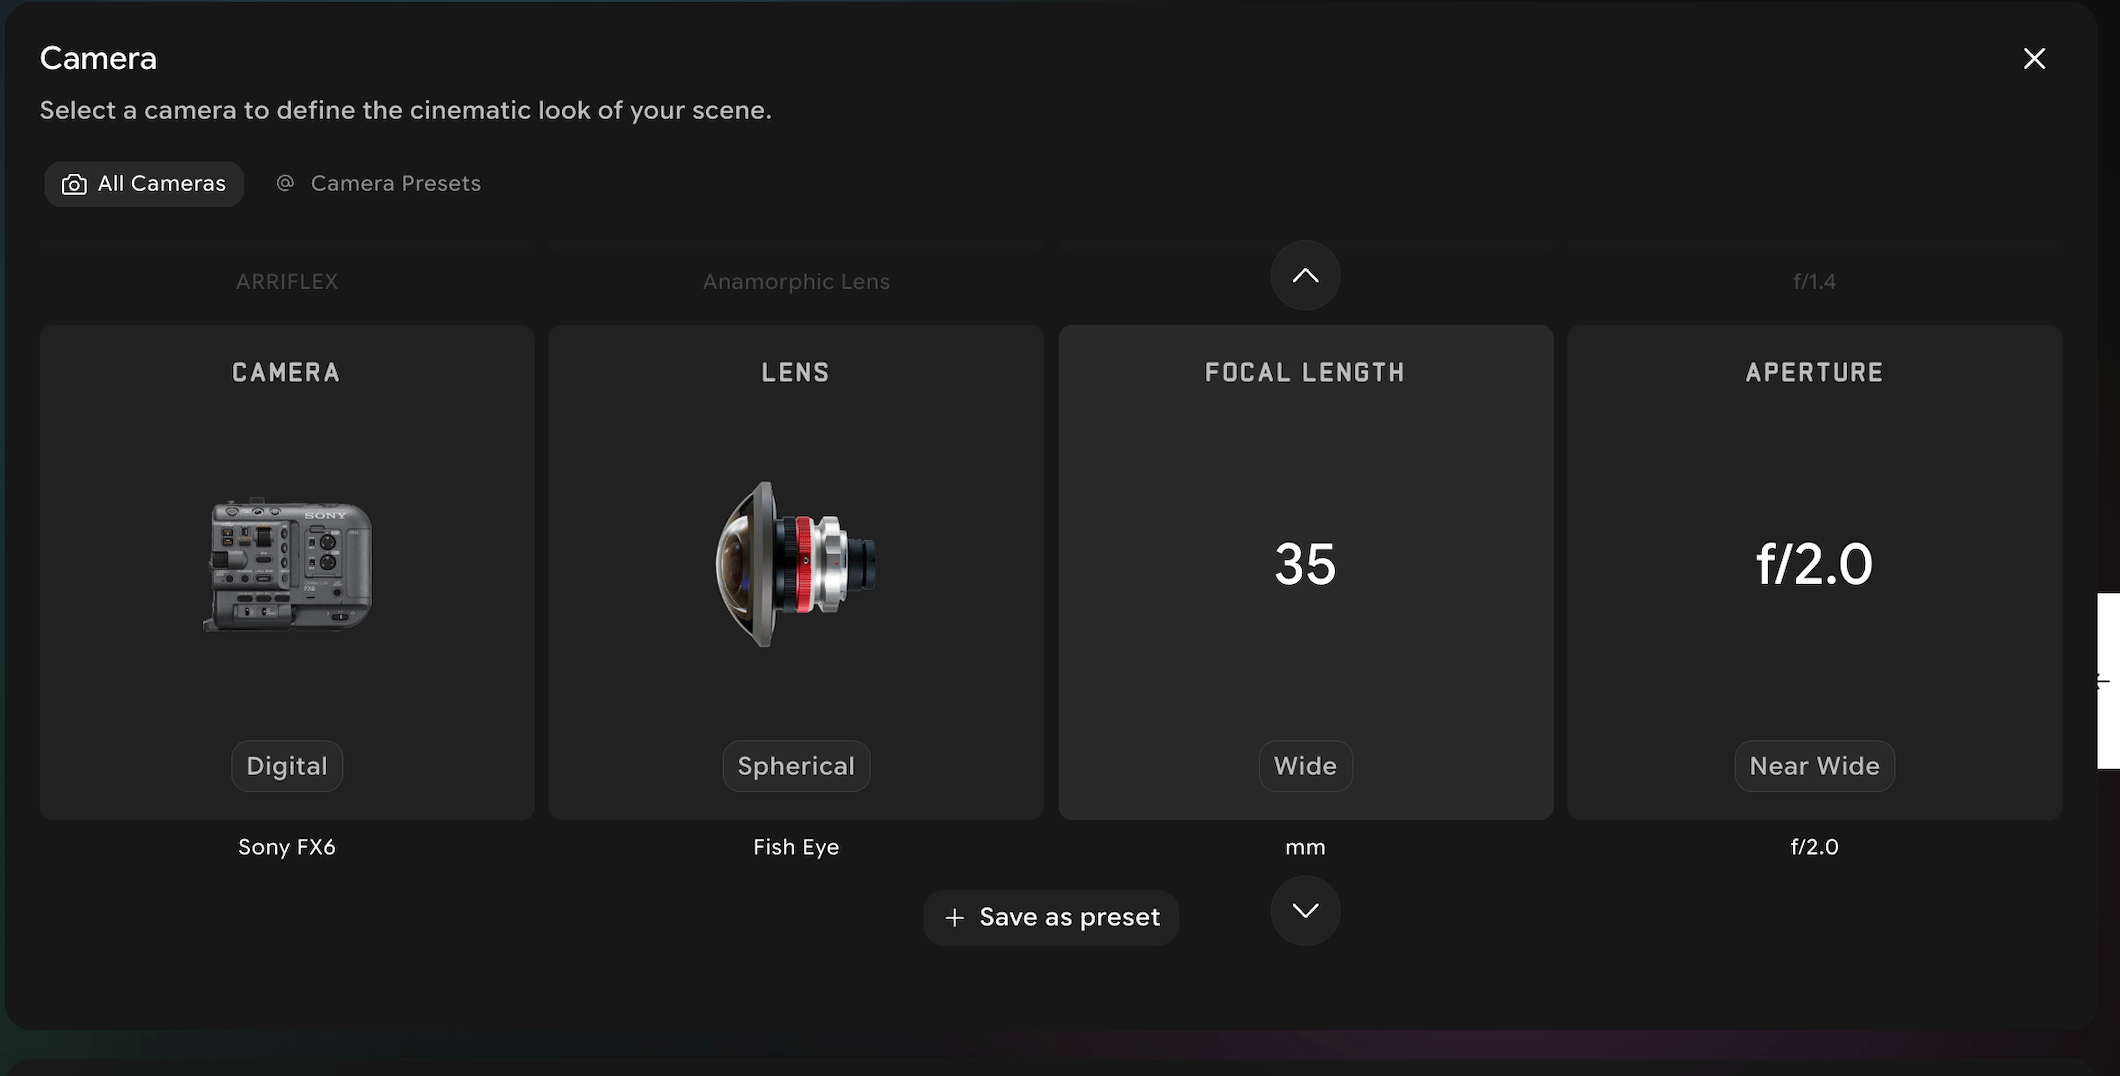
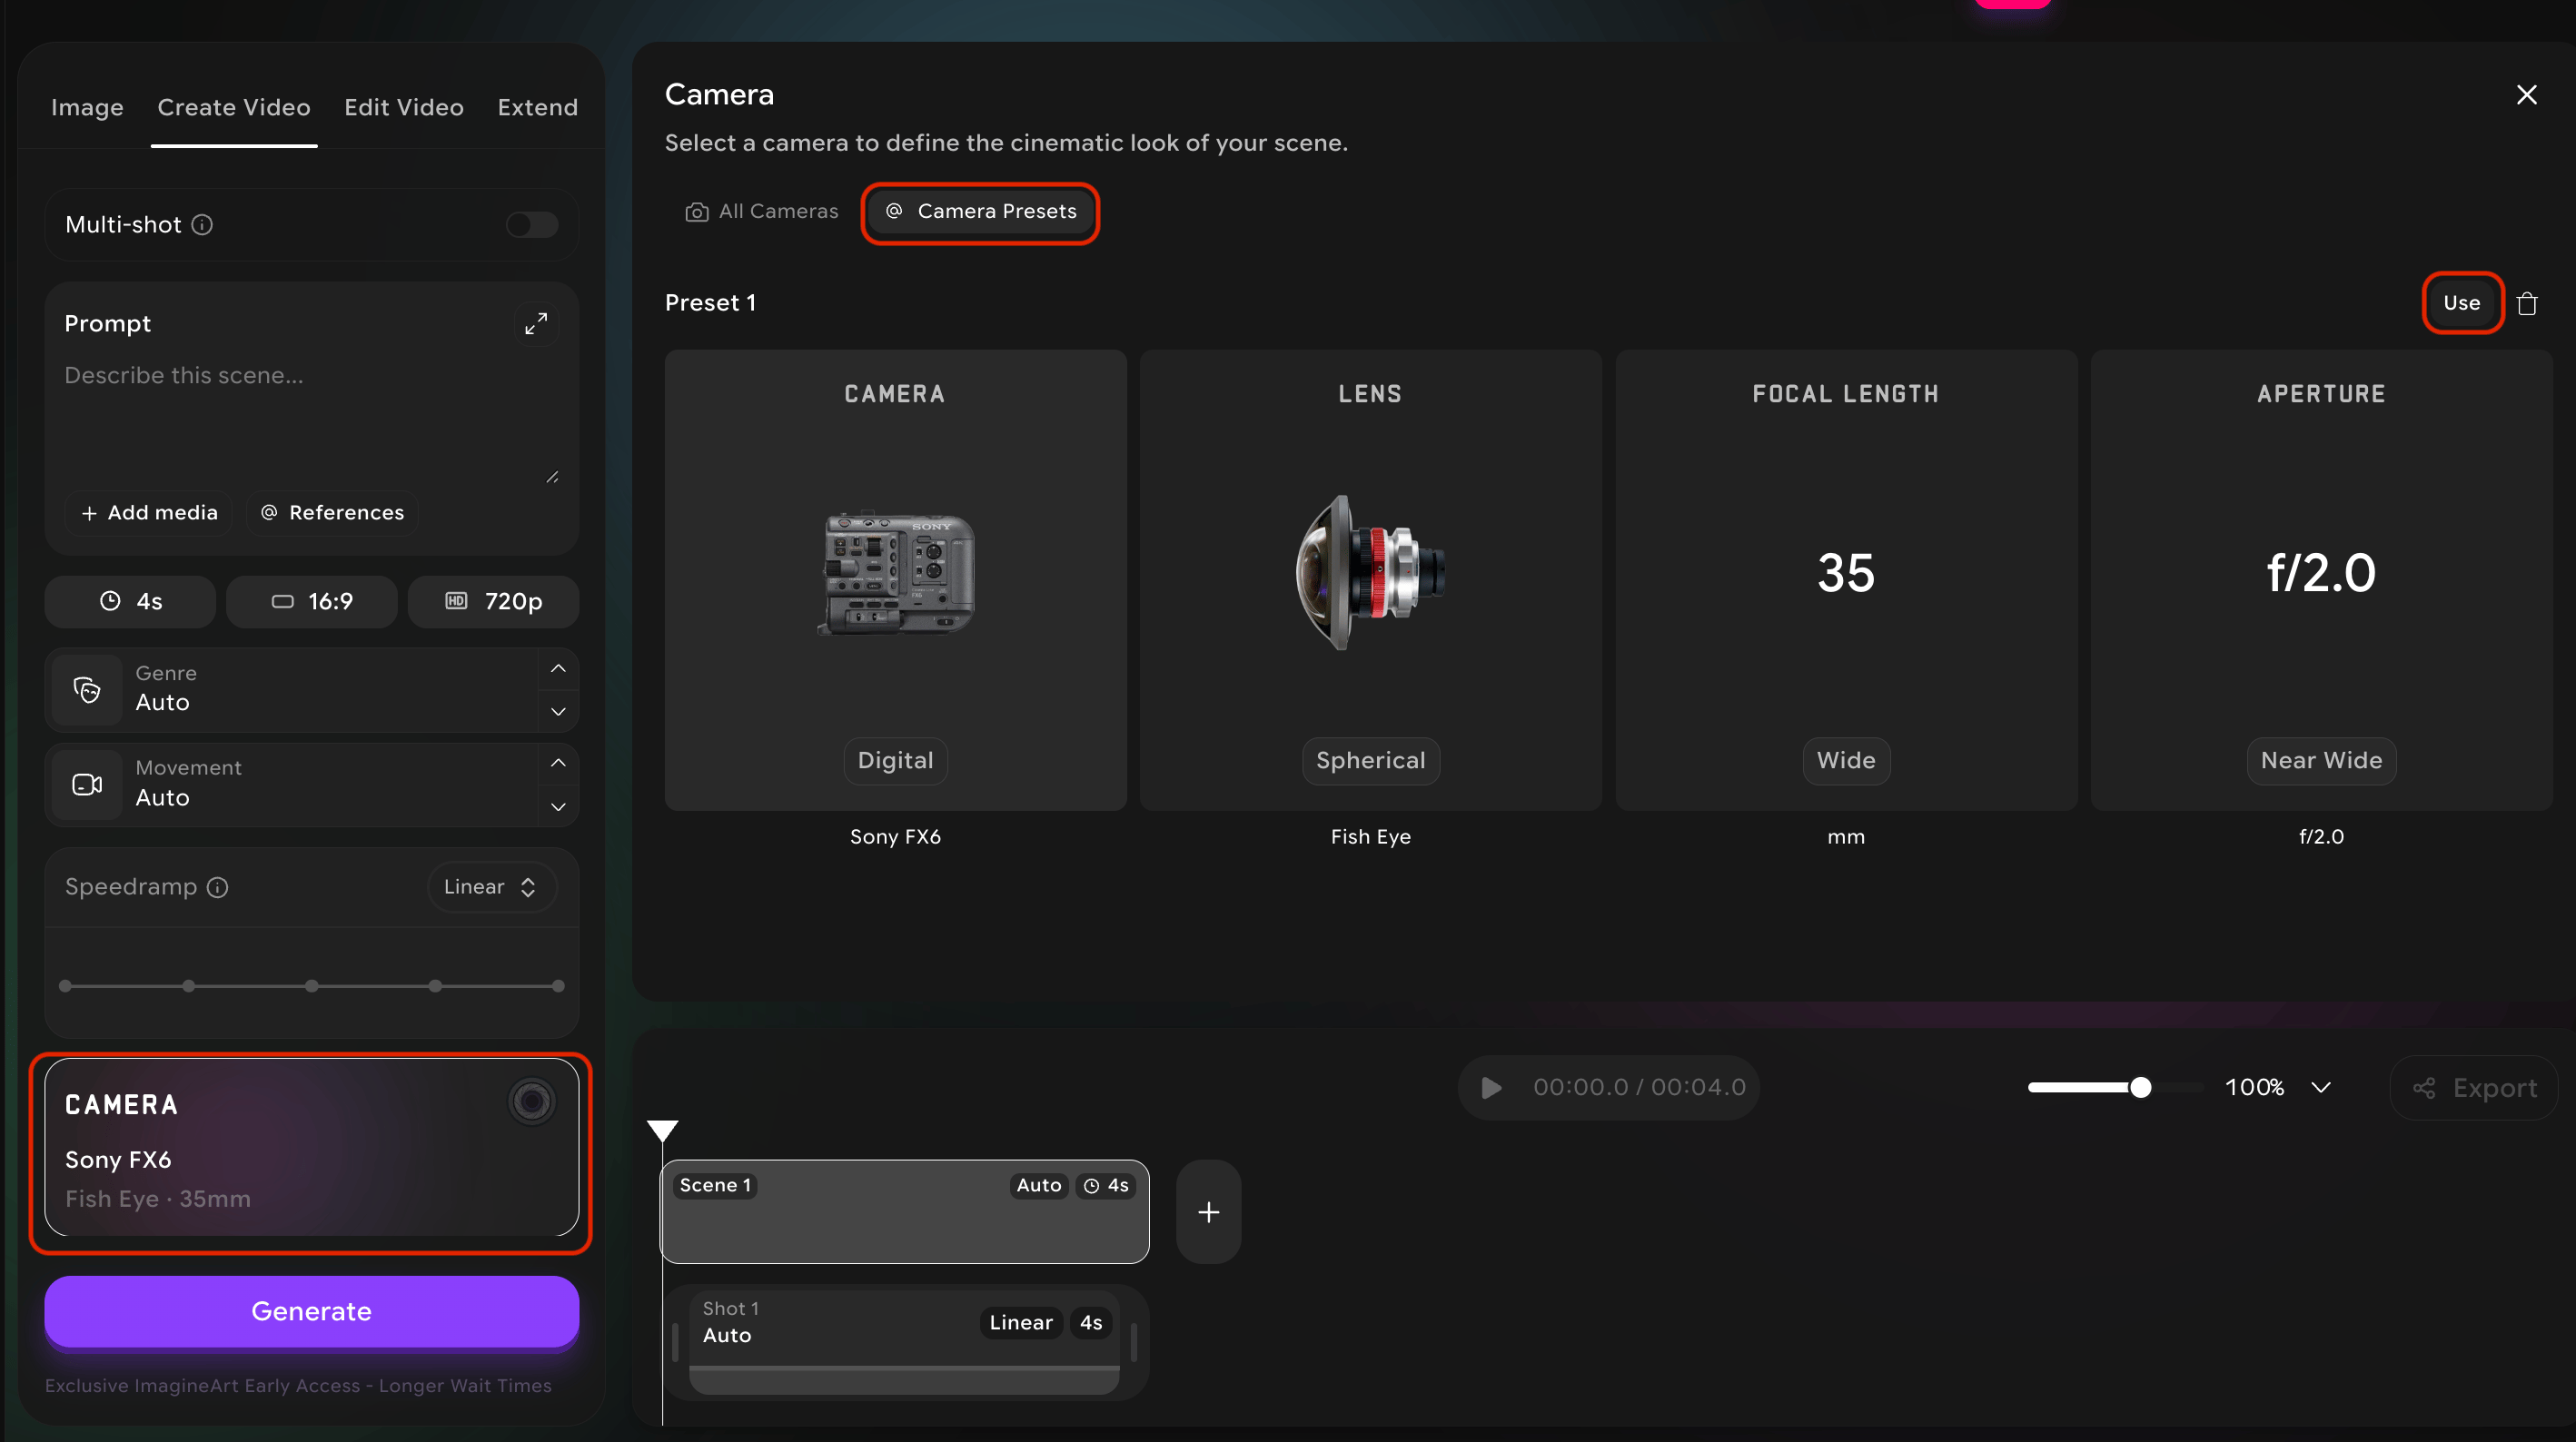
Try this — For your first project, build exactly one preset and use it for every image and every video. This single discipline will do more for the consistency of your work than any other technique in this guide.